Ignition Switch Replacement
After driving your buggy for a while, you tend to notice when something goofy happens…or you tell yourself that as you put black tape over the check engine light on the dash…
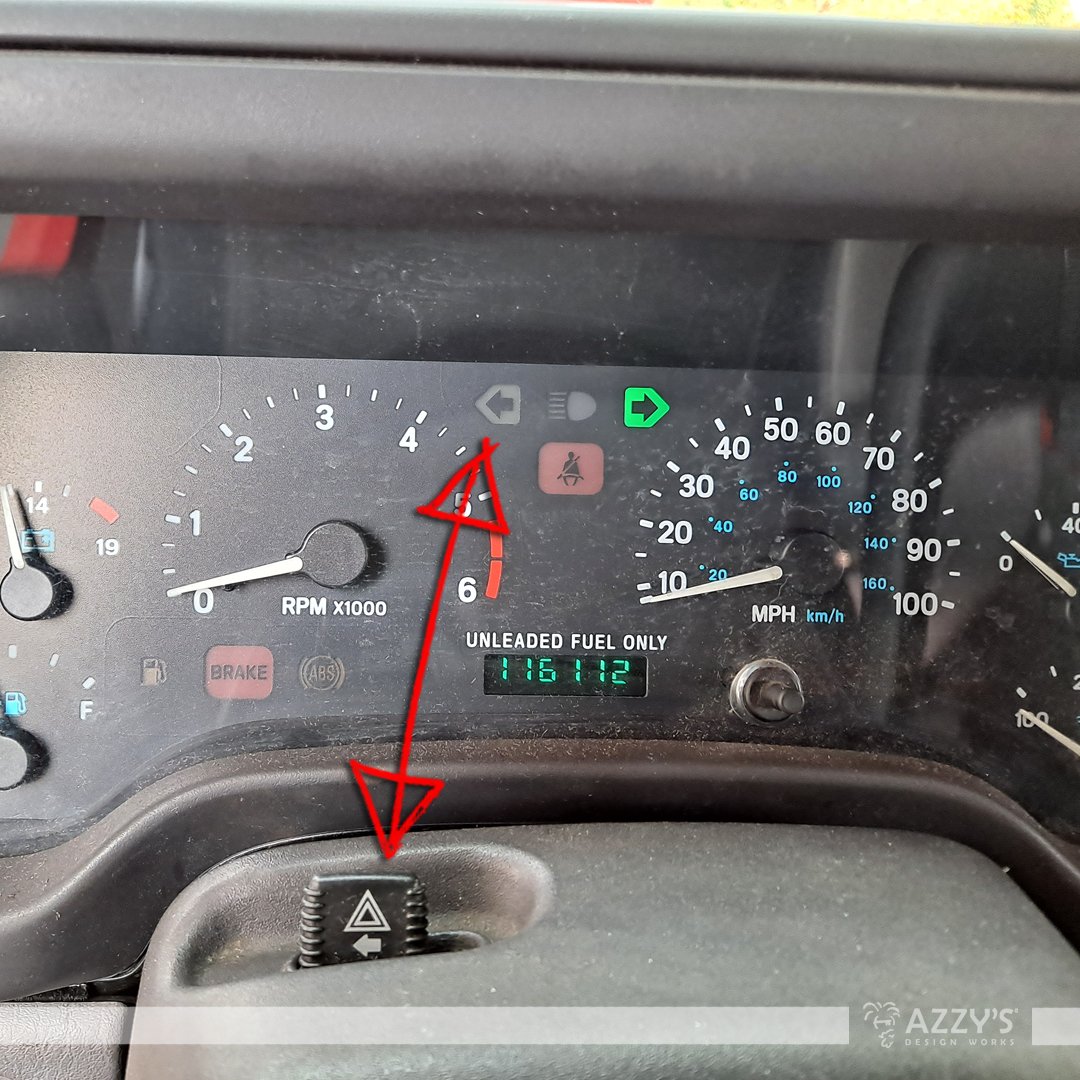
I was driving and encountered a problem on my dash—the left turn signal indicator wasn’t blinking. Naturally, I began to stew as I approached the front end of the vehicle—because it’s always the damn driver’s side bulb that tends to go out (a socket problem—we’ll deal with that another time). But, to much of my chagrin, the bulb was flashing away contently.
I changed out the bulb when I replaced the lenses on the back end of the TJ, so I was thinking perhaps I didn’t put the bulb all the way in—guess what—it was blinking away, too.
Dumbfounded, I wriggled back into the driver’s seat thinking the damn dash indicator bulb was burnt out. I pulled the dash a few weeks earlier to swap out the heater core and A/C condenser, so maybe I bumped the back of the cluster…
Break out the tools
Well, doing some digging, the dash light bulbs were fine—I swapped out the non-functioning one for the other turn signal’s and nothing changed.
Checked the connection of the wires to the cluster—nothing.
Irritated because the damn Jeep® gremlins struck again, I figured it would work itself out. Put dash back together, and stuck my key in the ignition. I turn to ‘ON’, and put on the hazards to see if anything changed—nope.
But wait…why is my BRAKE light oddly illuminating and fizzling out? Where is the usual audible “bing bing bing” when putting the vehicle ‘ON’?

I slid my hand down to the key, and pressed it in further, and then the usual audible nonsense occurred. I looked down at the insertion point of the key, jiggled the key, and the sound would cut in and out. Well, I’ll be damned—it’s the switch.
TOOLS
The usual stuff to get this job done is pretty simple:
Phillips head screwdriver
T15 Security Torx driver (or bit)
Replacement Ignition Switch
A cold beer to relax yourself from doing all this troubleshooting and realizing it was something trivial
(remember that you tend to notice something goofy comment earlier?! Yeah, I didn’t notice…)
SAFETY
I hate having to say this stuff—use your head when working with electrical component; disconnect your battery. You can reprogram your terrible selections of “music” in the radio when you are done.
DISASSEMBLY
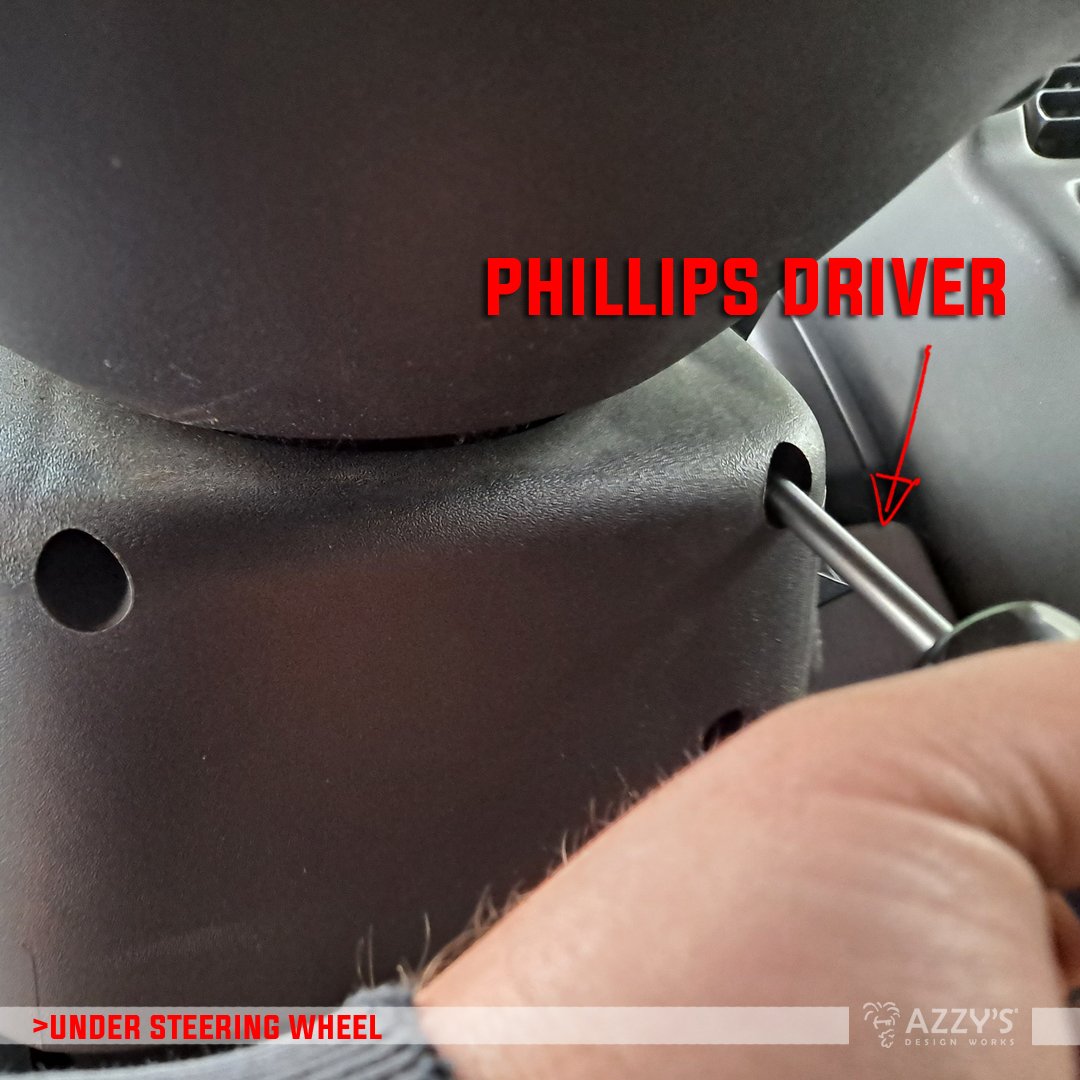
Tilt your wheel upward as far as it will go.
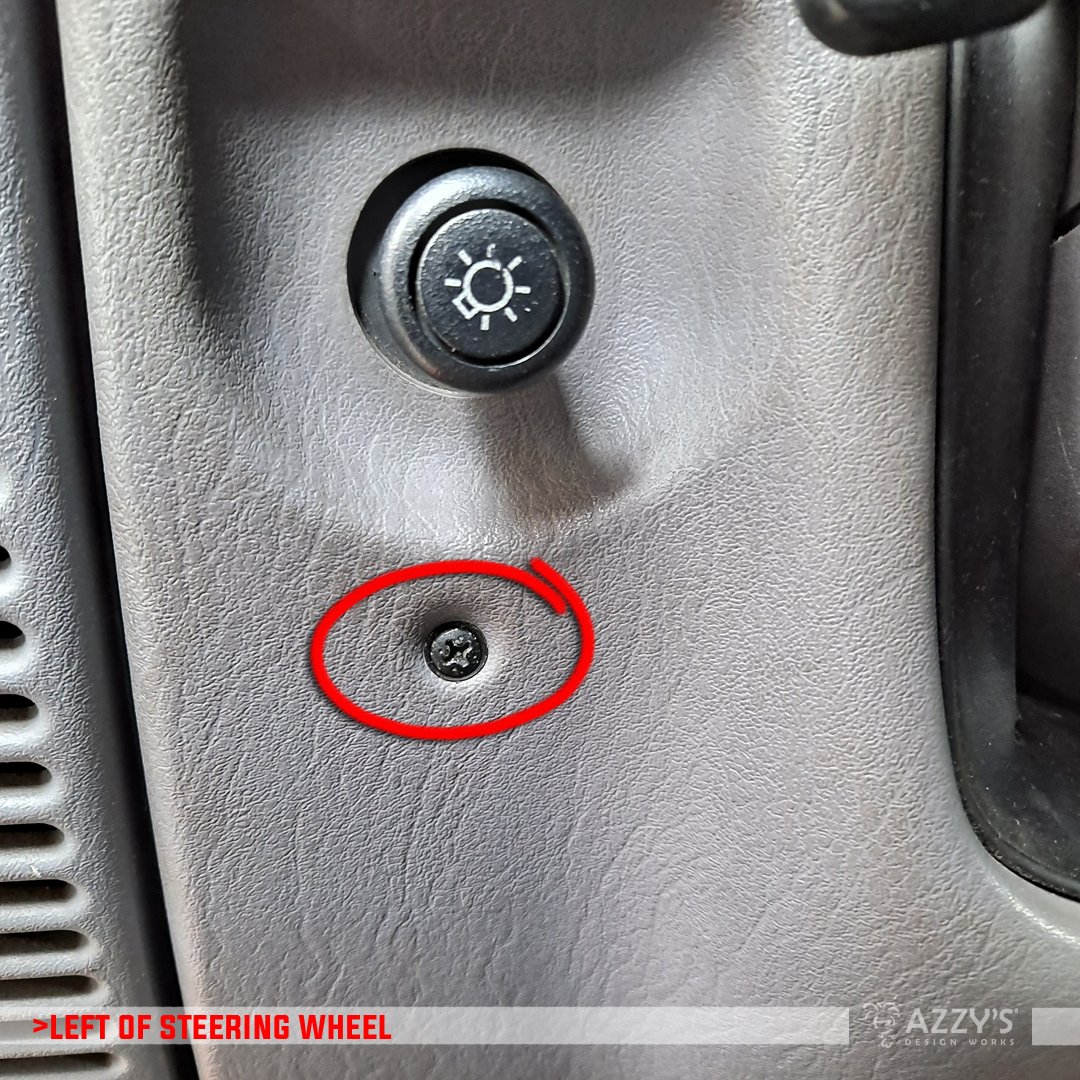
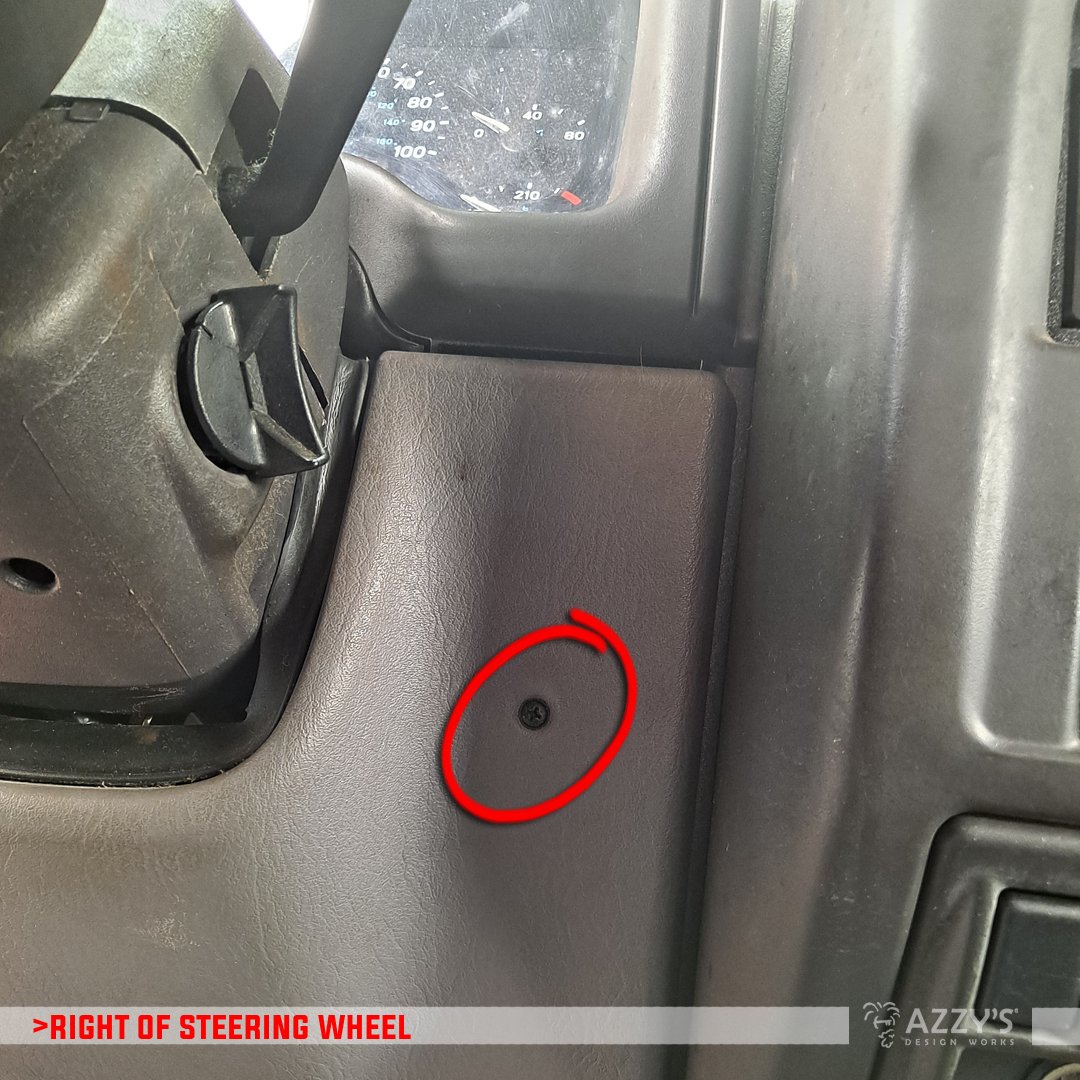
Start on the side toward the door, and remove the Phillips head from under the light’s pull-switch on the dash. Move over to the opposite side of the steering wheel, and take out the Phillips head screw there.
Stick your key into the ignition, and as you pull the bottom dash plate toward you, twist the key to ‘START’ let the dash part pass by without much manhandling. I comment on this method because I don’t want to break dash parts on a 25+ year old vehicle…
Lean the bottom part of the dash down toward the seat, and pick up the area still connected to the dash; it’s held on by plastic connectors that will slip apart once you’ve tilted it down enough.

You can now remove the steel plate that was behind there, BUT I didn’t; I felt I had enough room to access what I needed. If you can’t reach any wires or connectors in the next couple steps, you’ll have to take off the panel.
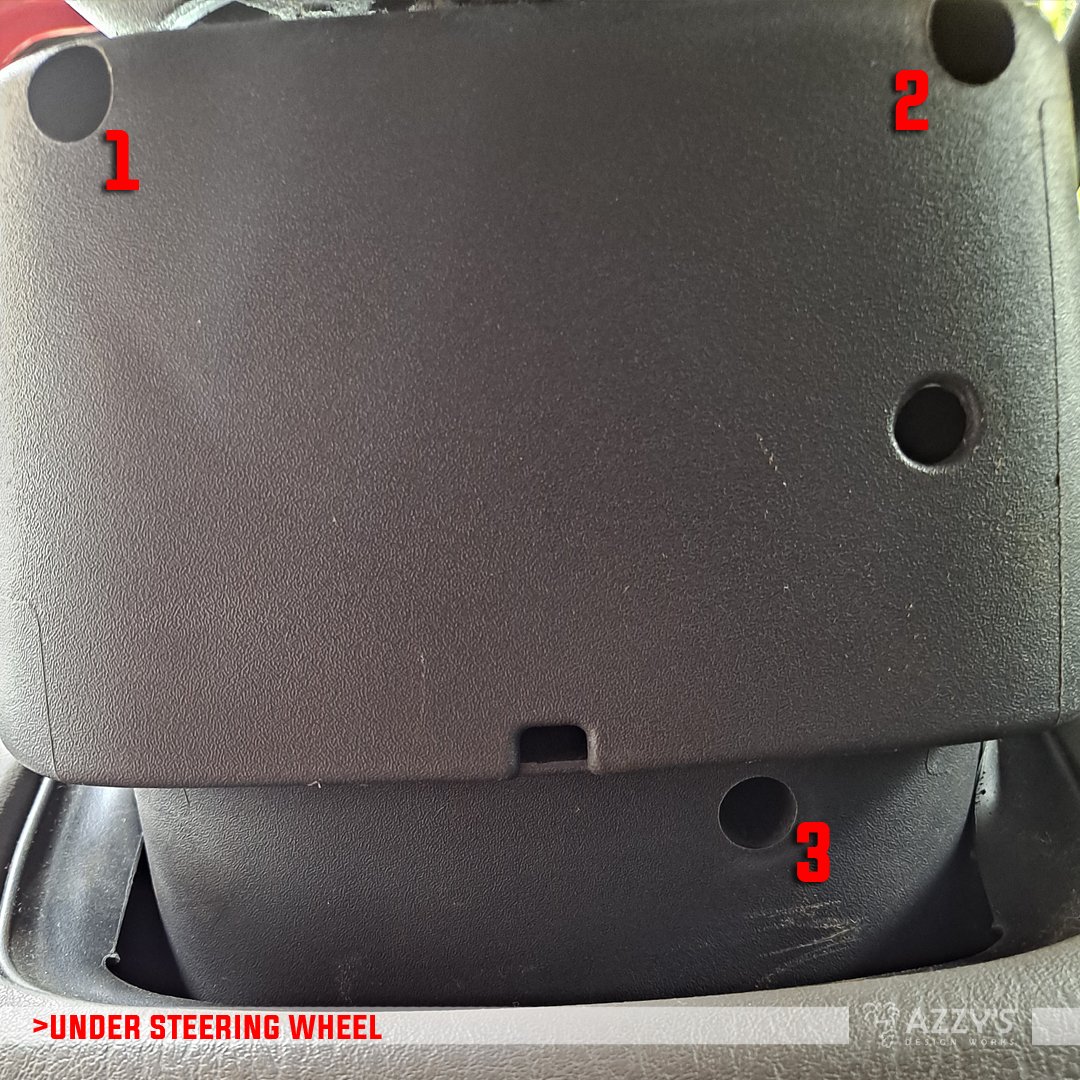
Look under the steering wheel and locate the three (3) holes that house the Philips screws—loosen and pull them out. (NOTE: these may be TORX head in later years, so just a head’s up—I’m in a ‘97).
Mind the ignition with your key still in there. Turn the ignition back to ‘OFF’ and take out the key.
After that is out, grab that bottom piece connected on to the steering column and pull it downward. One side of it will need to go around the ignition; or you can do like I did and just lean down the one side to access the switch on the inside.

The switch
The black box you see on the side of the column—once the bottom panel is out of the way—has two (2) connectors on the back side, and a single screw holding it physically to the column. To not stress the wires and connectors, I left the switch bolted in and addressed the clips.

Start with pushing the red lock clip on the bottom-rear connector toward the dash. Once popped, get your sausage fingers around the tops of the connectors then squeeze and pull toward the dash. You don’t need to tug a whole lot, just enough to get the connector over half-out of the switch.

Right below the turn signal arm is a black, rubber cover—simply slide that up-and-out of the way, and there is the security Torx bit to remove. Take out the screw. Wedge your grimy little ticklers behind the switch, and pull away from the column.
Be mindful AGAIN of the wires and connectors on the read of the switch—if you had them out enough, your action of pulling away from the column will pop those the rest of the way out.

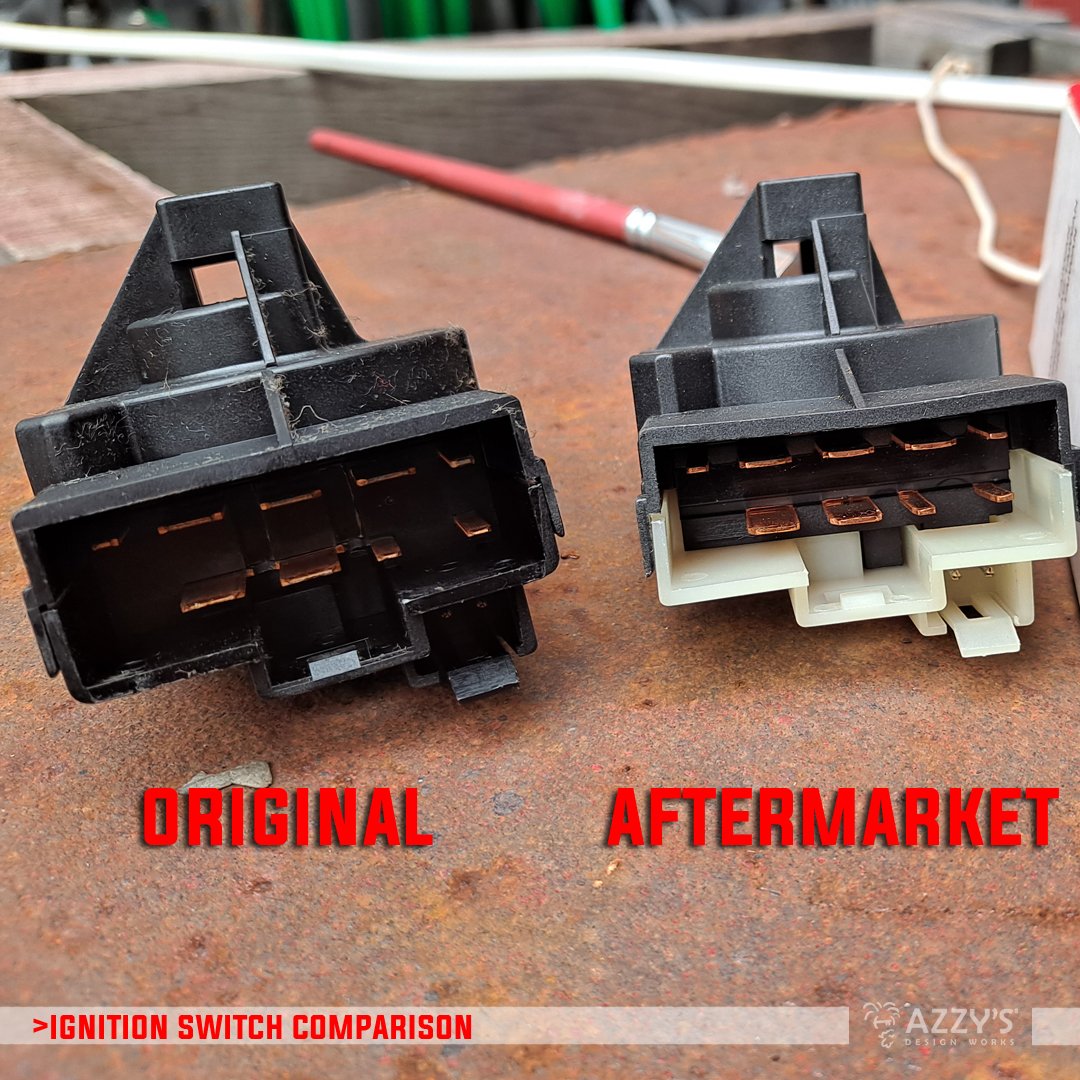
When comparing the OE switch to the aftermarket one, nothing has changed aside from the plastic makeup of the particular one I purchased from Amazon (because the local parts dump didn’t have one in stock).
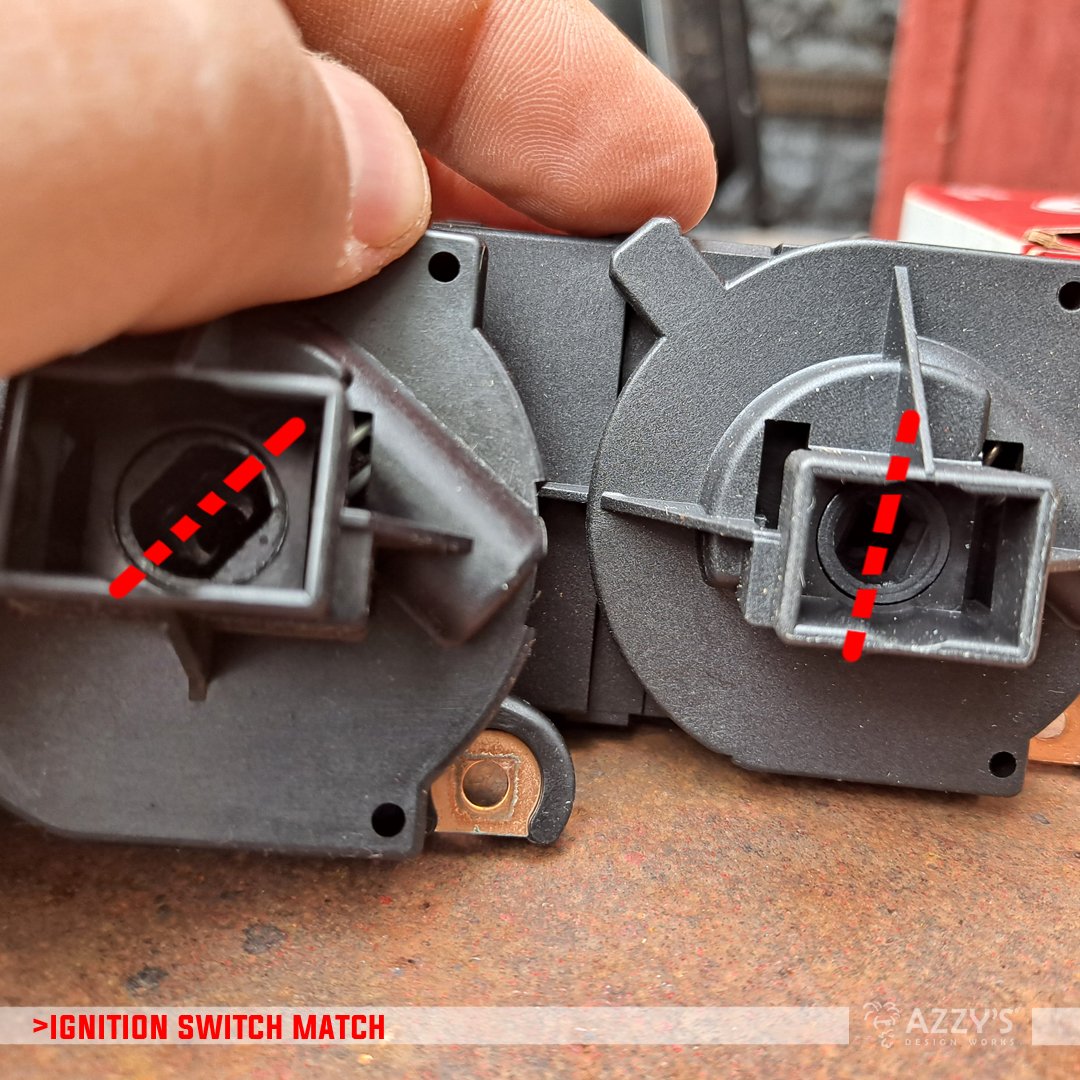
Before you put in the new switch, look at the area where the key’s tumbler will connect and see how the little rectangle inside the switch is clocked. Use your finger to get the item clocked into the same position as the OE one you plucked out.
INSTALL
Get the rear of the switch up to the connectors, plug them in, and twist the front of the switch up; gently push the switch into the column, and work the Torx back into it’s hole.
At this point, you can reassemble everything, OR you can reconnect your battery and do a test-run if the new switch works.

WRAPPING UP
Once I got everything back together, I put the key in the ignition—and heard the audible door-open beep. I turned the key to ‘ON’ and the BRAKE light is bright and lit (because my hand brake was on). I put the hazards on, and BAM—it lights back up as it should.
This is one of those deals where some small connection problem relating to the switch doesn’t allow consistent power / signal through the rest of the system, coming off as those goofy gremlins.