Universal Joint Replacement at the Front Wheel
So how hard is it to swap out the front universals at the wheels on a TJ?
Well, it isn’t as bad as you might think…if you have a few hours, some basic hand tools, and the mouth of a trucker, you’ll do just fine. Just for the sake of making things easier, I decided to take photos of the process to walk you through on what to look out for.
DIAGNOSIS
Like anything else when dealing with a Jeep®, the last thing you want to do is just throw money and parts at the damn thing—this’ll lead to just more aggravation when you have a shiny new part applied that didn’t fix what you were trying to accomplish.
We’ll talk about Jeep® gremlins another time…
Diagnosis for this particular part is pretty simple. When you are driving—particularly from a dead-stop—you’ll hear (and probably feel it) a decent <CLICK!> sound.
To double check, you can crawl under your buggy (making sure it is on a level plane, in park, wheels chocked, on a Tuesday, with safety glasses, etc.—you know the drill by now about safety) and grab the front driveshaft and give it a little side-to-side twist.
If your joints are bad at the wheels, you’ll see those little bastards twist without the wheels moving. Now that you know they are trashed, let’s change ‘em out.
SAFETY WORD
Make sure you are practicing good safety when working on your rig—use jack stands, wheel chocks and keep out of the way while the vehicle is lifted. Don’t let the guy with the crushed femur tell you that you’re a sissy because you are using more than a bottle jack and a bottle of Jack…
TOOLS
Here is a general list of what I used to get the job done. Some fasteners may be different on your Jeep® thanks to bolts being swapped out due to age degradation, aftermarket pieces, or moron mechanics who slapped stuff together because it was woman-owned vehicle…
Anywho, here is what I used:
Ratchet
Sockets (12 point and 6 point)
13, 12, 10MM
¾, ½ INCHBreaker bar
Floor Jack
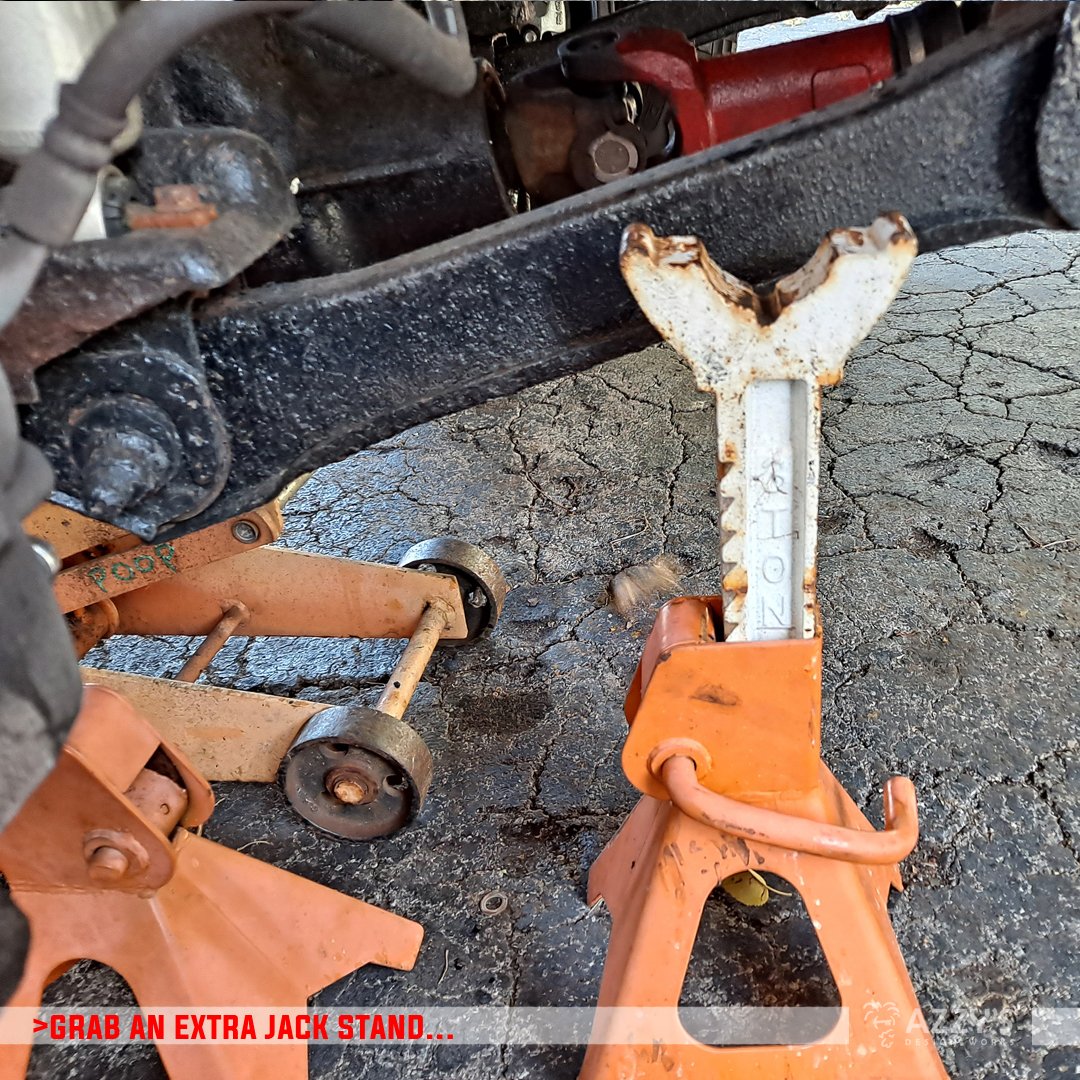
Jack stands (2)
Brake cleaner
PB Blaster (spray penetrant)
Cold chisel
Large hammer (ball peen or mini sledge)
Bench vise
MOOG® 371 Universal Joints
Sandpaper (120 grit)
Black paint
GETTING STARTED
Raise the TJ enough on the one wheel to pull that tire. Get a jack stand under the axle, and keep the jack placed in a manner where if the jack or stand slips, the other will help decrease the vertical decent. Pull off your wheel and let’s check out the mess you are in.
BRAKE CALIPER
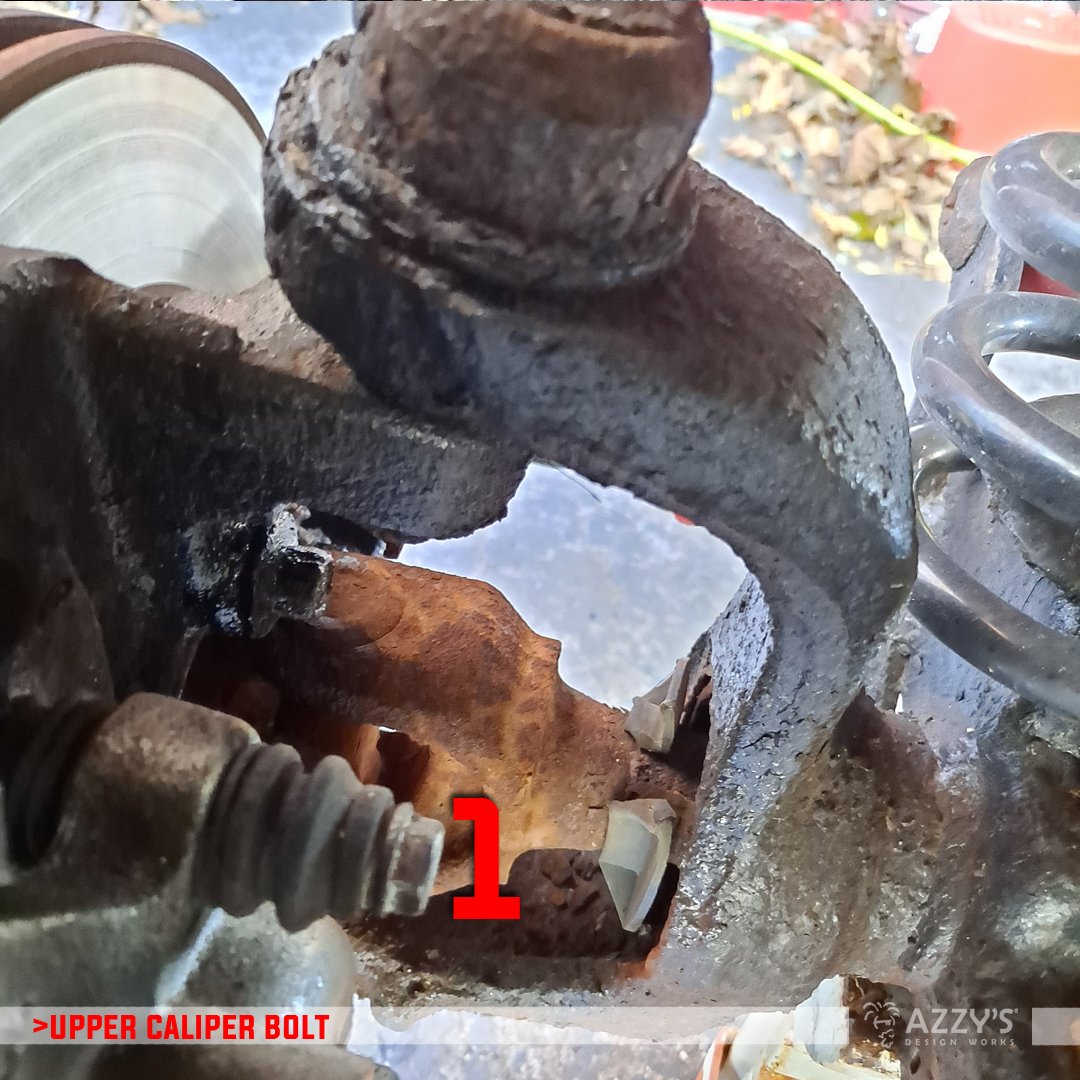
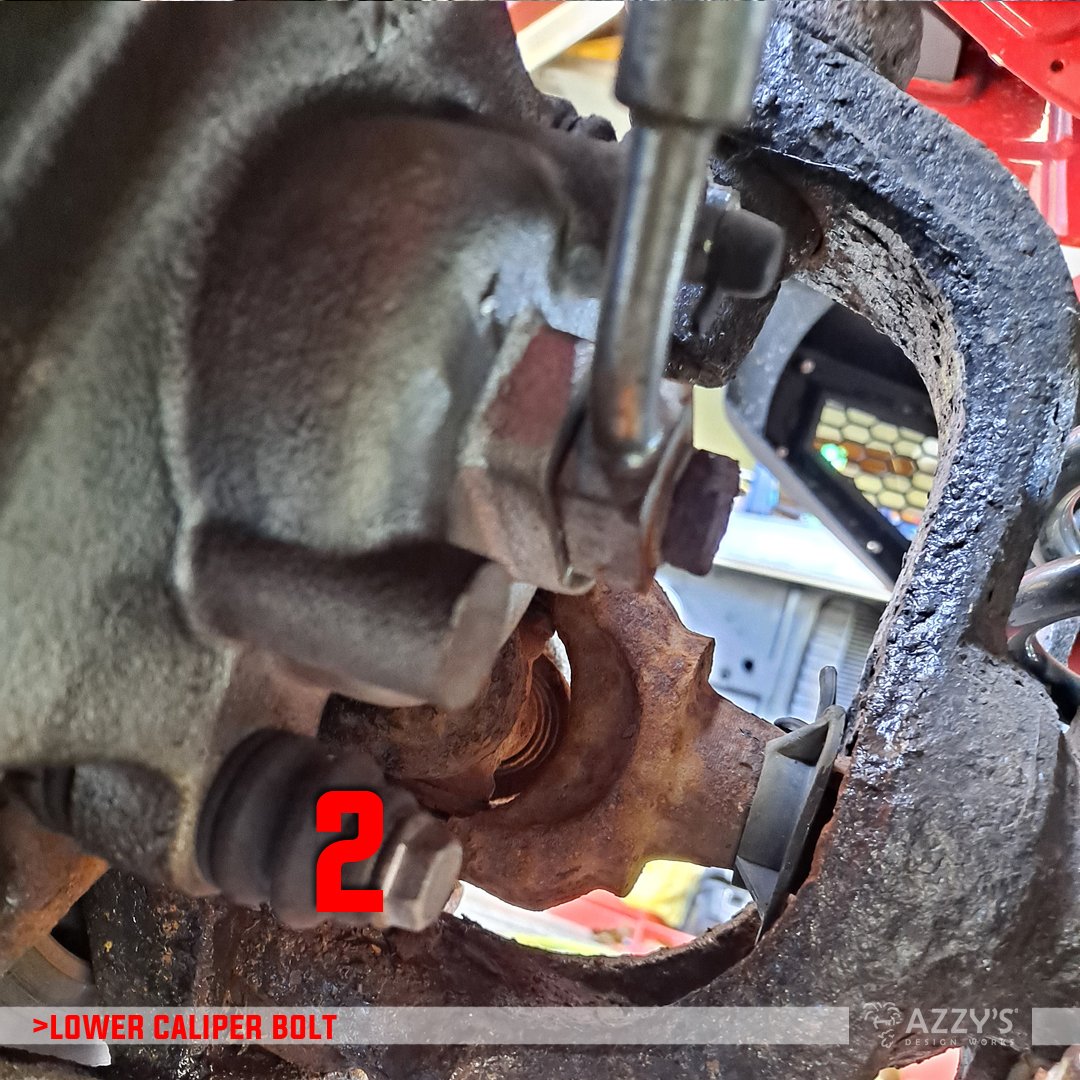
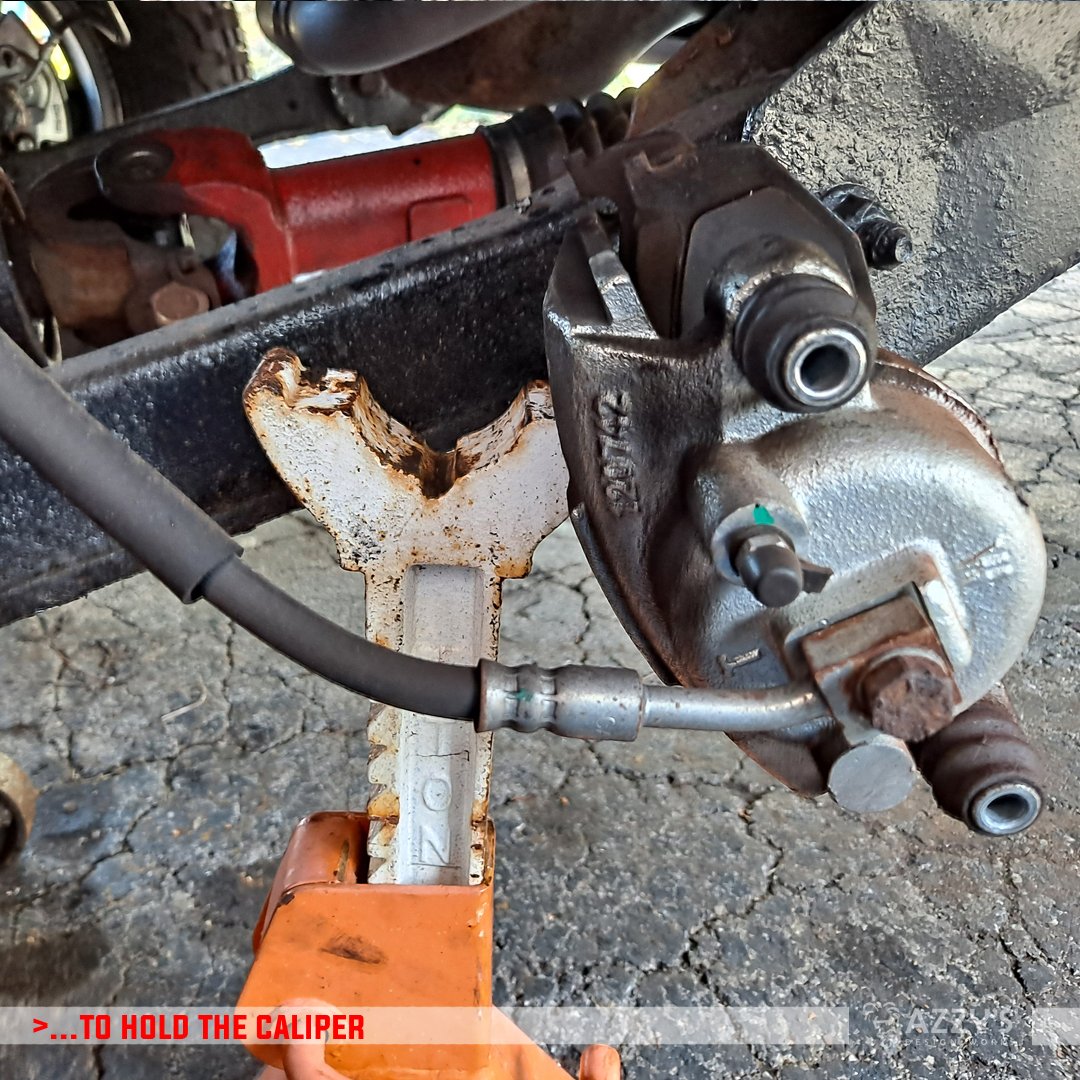
Let’s take off the caliper first.
There are two (2) bolts that come out which releases the caliper from the front spindle. When you pull those bolts, lift up on the brake caliper and the pads should stay inside as one whole unit. I grabbed another jack stand and flipped the whole caliper over and used the stand to hold the caliper out of the way. You can use wire or something else to help keep it out of your way, too.

Now you can check out your rotor and decide which route you want to go; if your wheel bearings are also going the way of the Dodo, then get the cotter pin out of the center, remove the cover nut, and then get a 32mm socket on your Hazard Fraught ugga-ugga and get ready to pop the bearing.
If your bearings are fine (like mine), all you’ll do is pull the bearing WITH the axle (and this is much less hassle, if you ask me…).
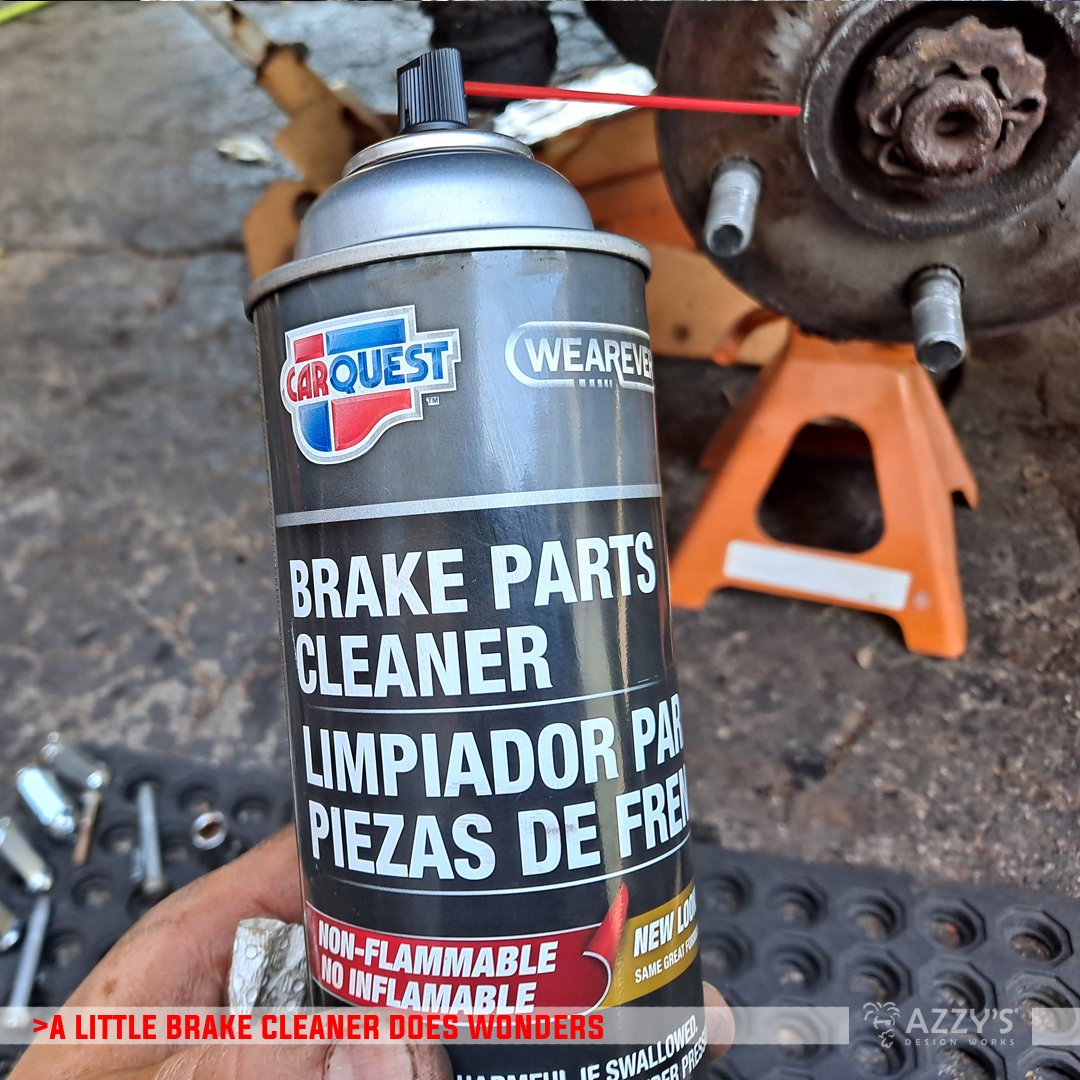
Pop off the rotor and grab your favorite can of brake cleaner and a wire brush—time to clean some years of neglect from this area around the axle.
Now, my brake dust shields decided to return to the Earth some time ago, so I run without them (you can argue for-or-against at your own leisure on your favorite social media platform—I honestly don’t care).
BREARING UNIT / AXLE
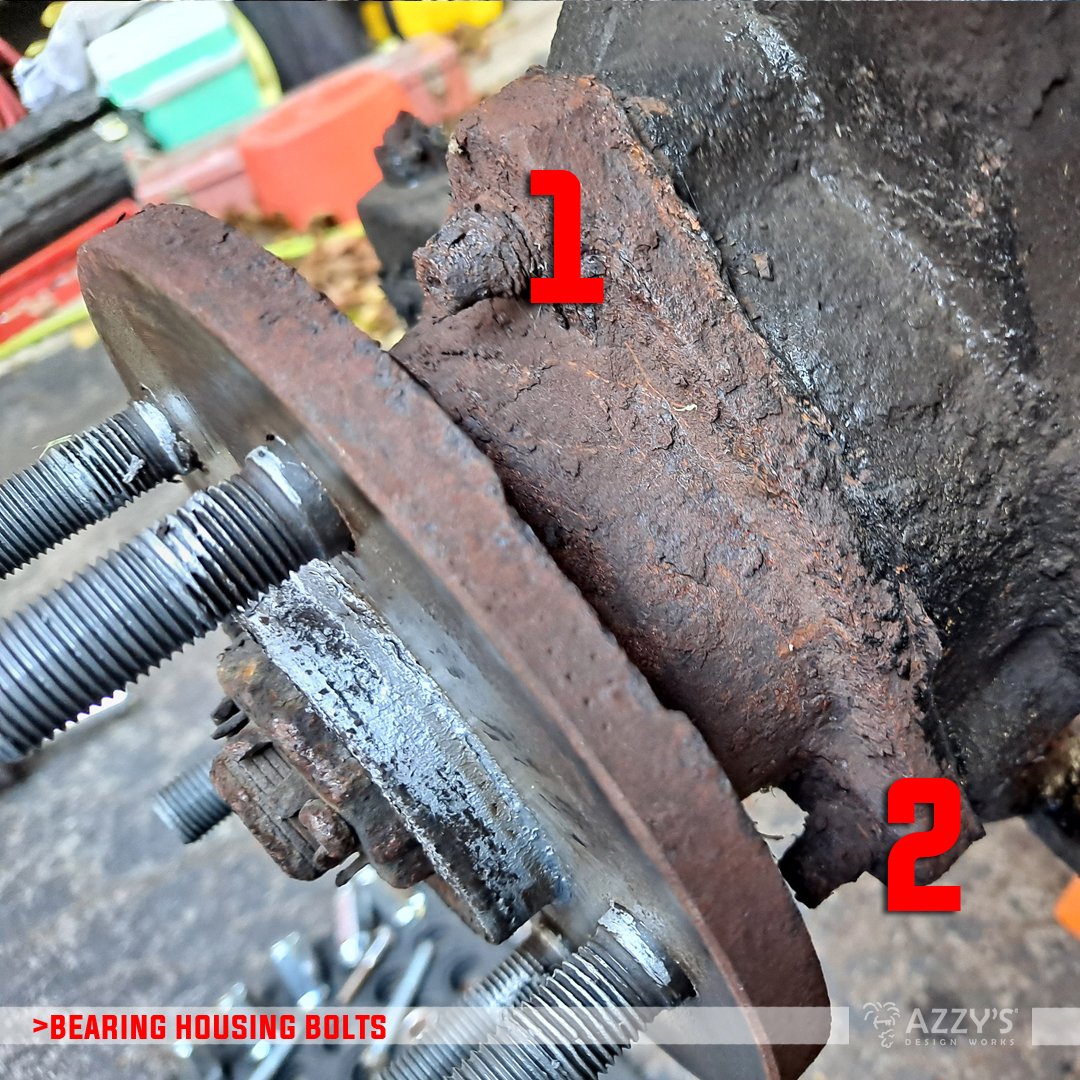

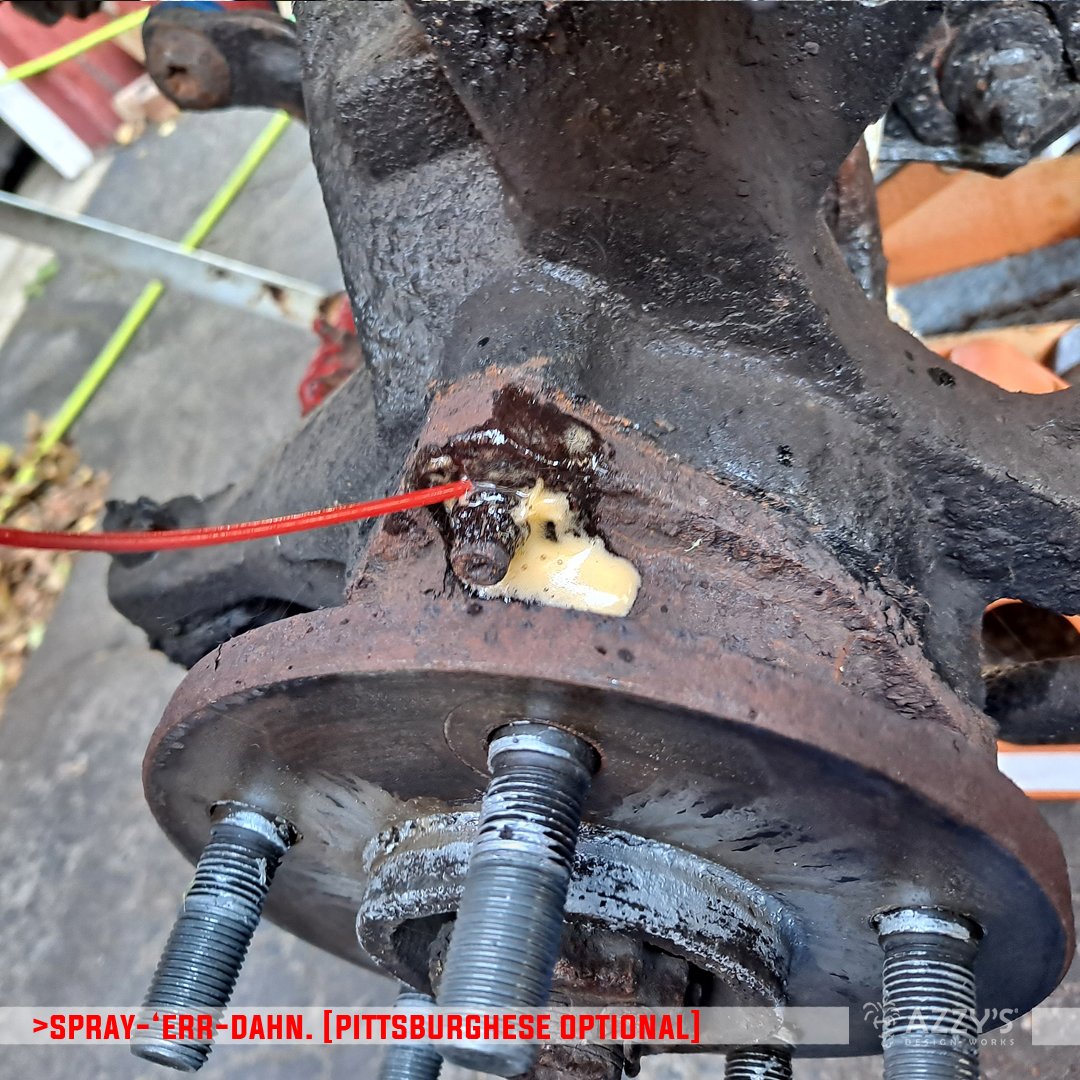
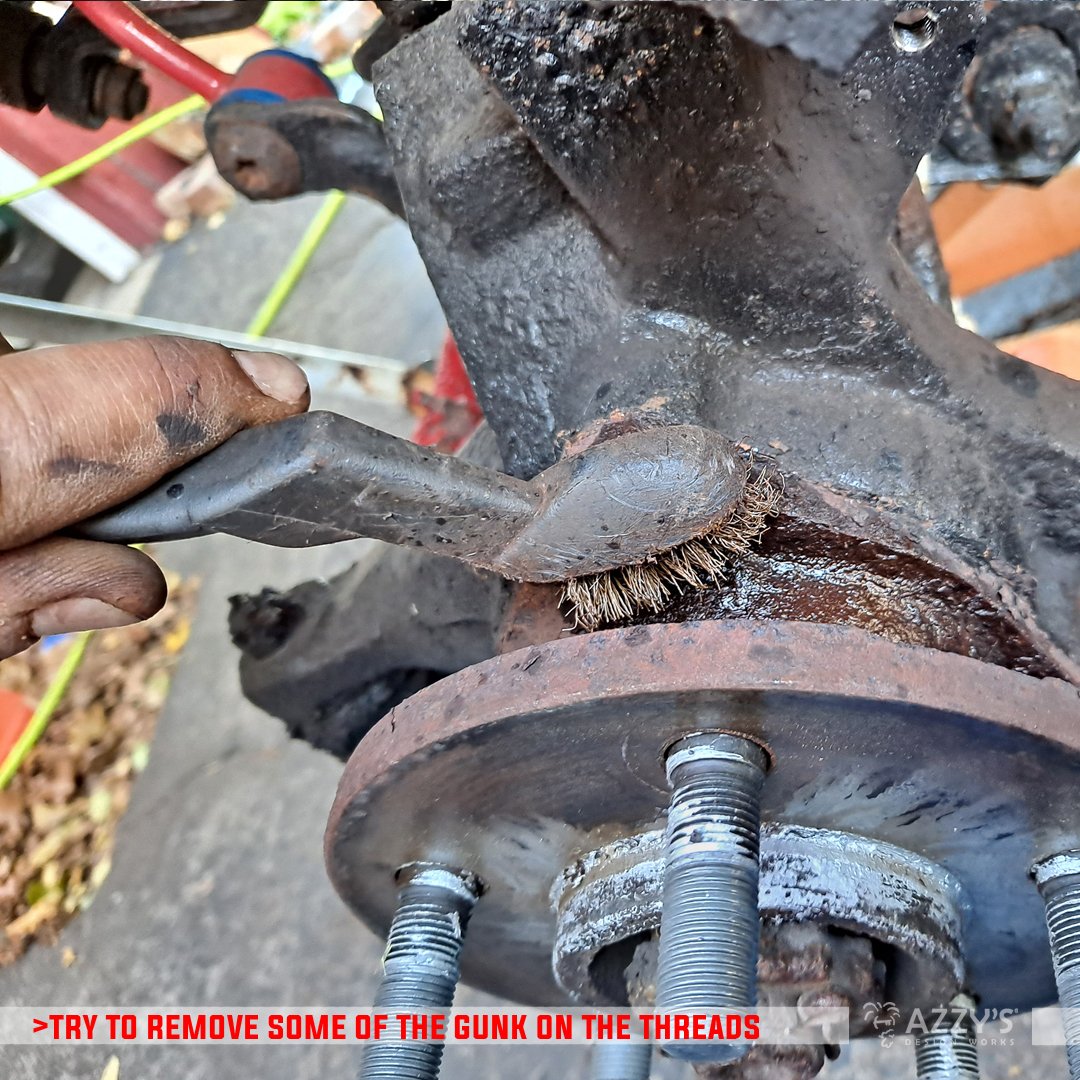
There are three (3) bolts that hold the bearing housing onto the axle tube. Based on your level of winter cruising and upkeep, these can be pretty gnarly looking. I suggest getting a good can of liquid penetrant spray and soak those threads. Lather, rinse, and repeat the process to ensure that oily goodness works its way into the threads.
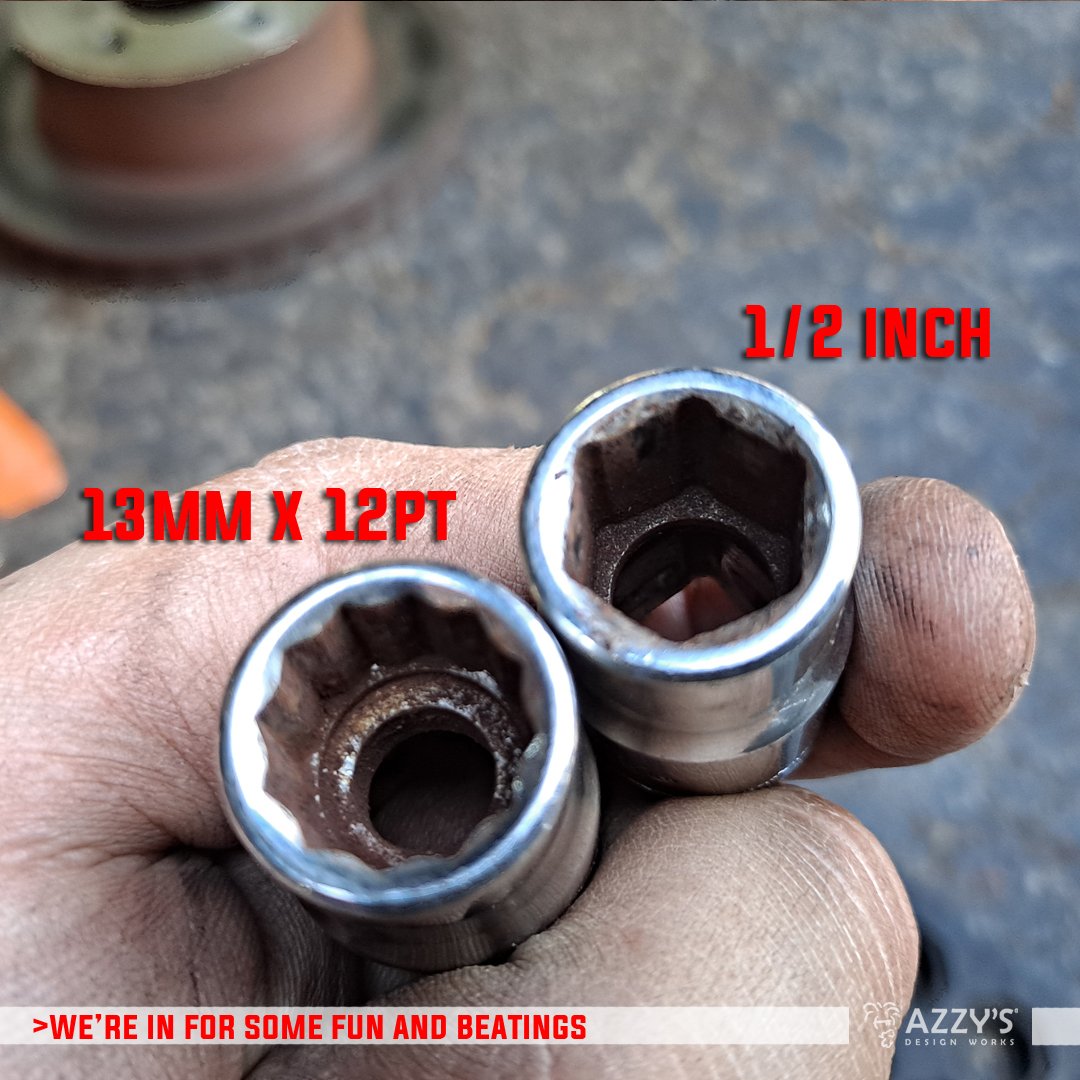
My bolts were—and I use that term very loosely—were 13MM, and a 12 point to boot.
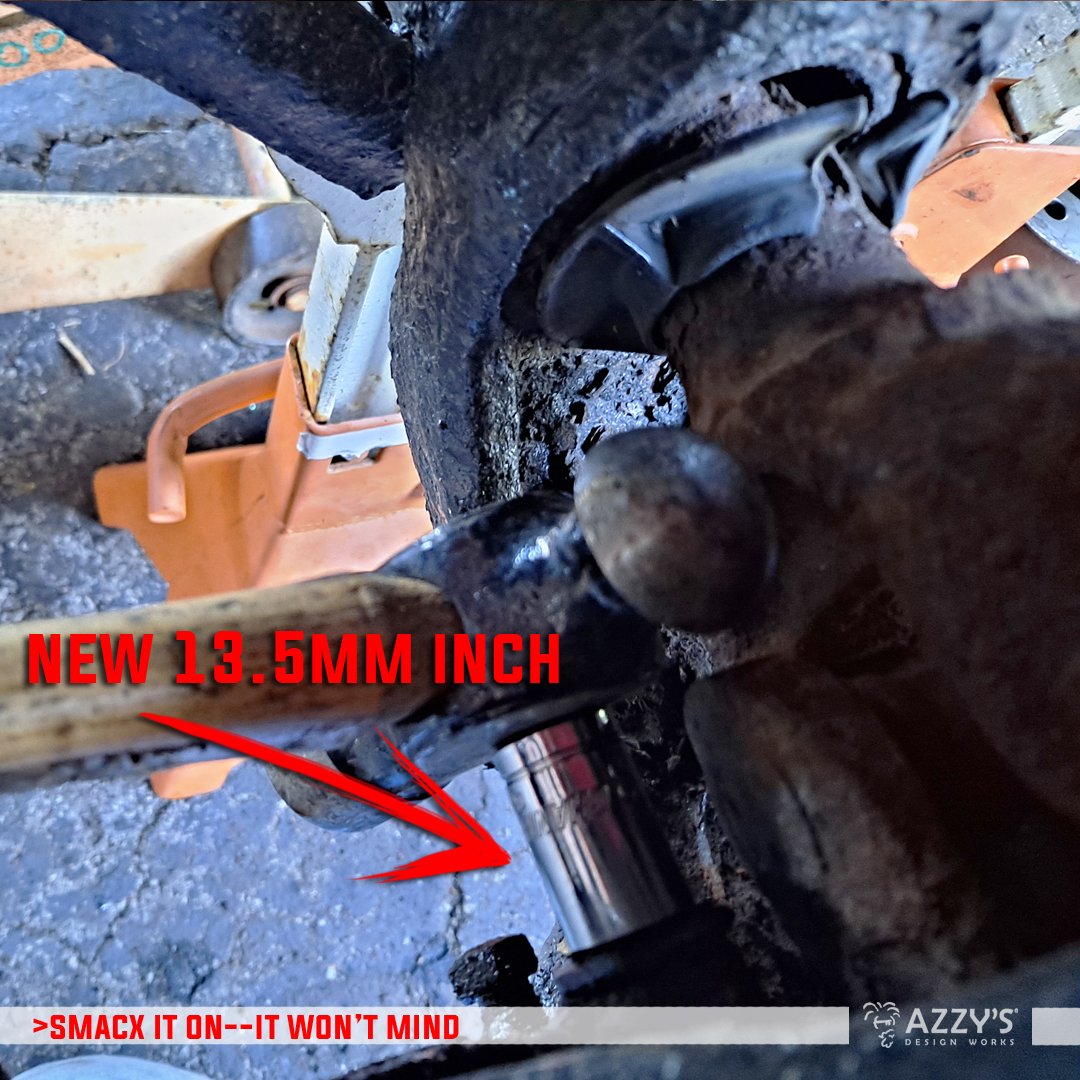
The reason I say this is because the top and rear-facing ones were this size, but the elements had their way with the front one, which needed some persuasion to accept a ½” socket onto it without slipping. I pronounce this new size a 13.5 MM INCH™.

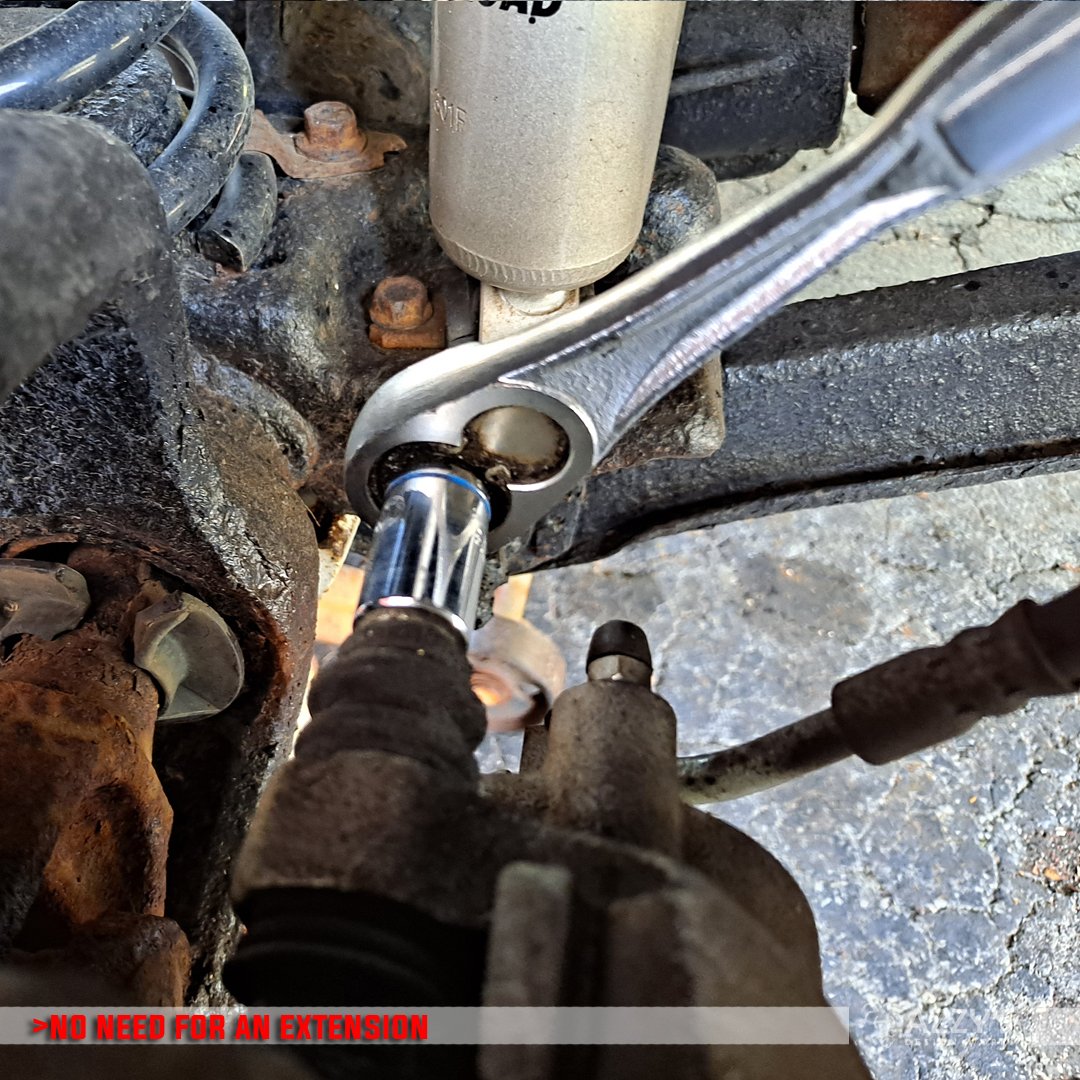
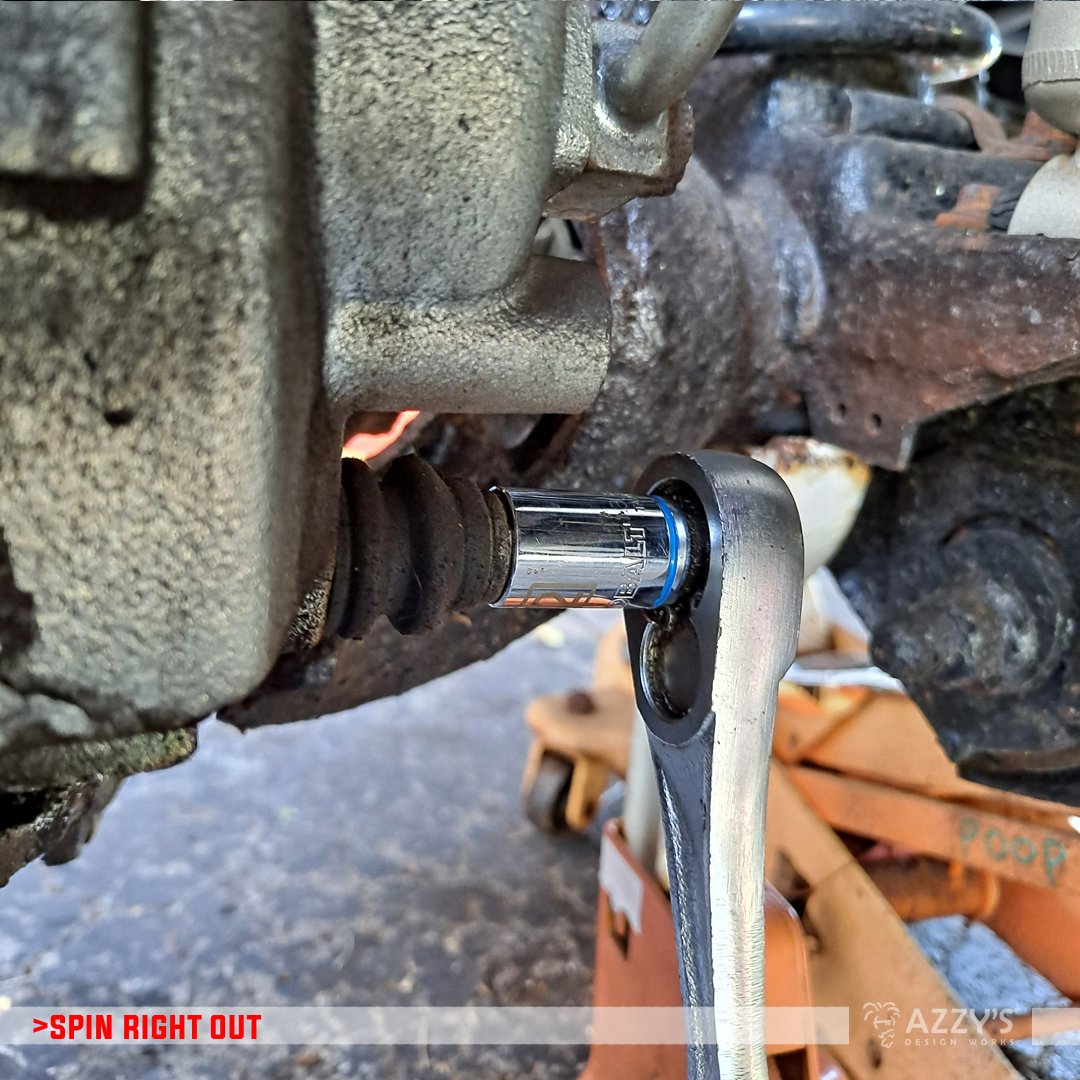
Once you manhandle the socket onto the bolt head, grab your breaker bar and an extension (I used half of the jack handle) and lean into it. Once you crack ‘em, swap out to a ratchet (I used a ½” ratchet) to work them out.
Pull two (2) of them completely but leave one (1) unthreaded in a little—you can use this method on the front or rear-most bolt.

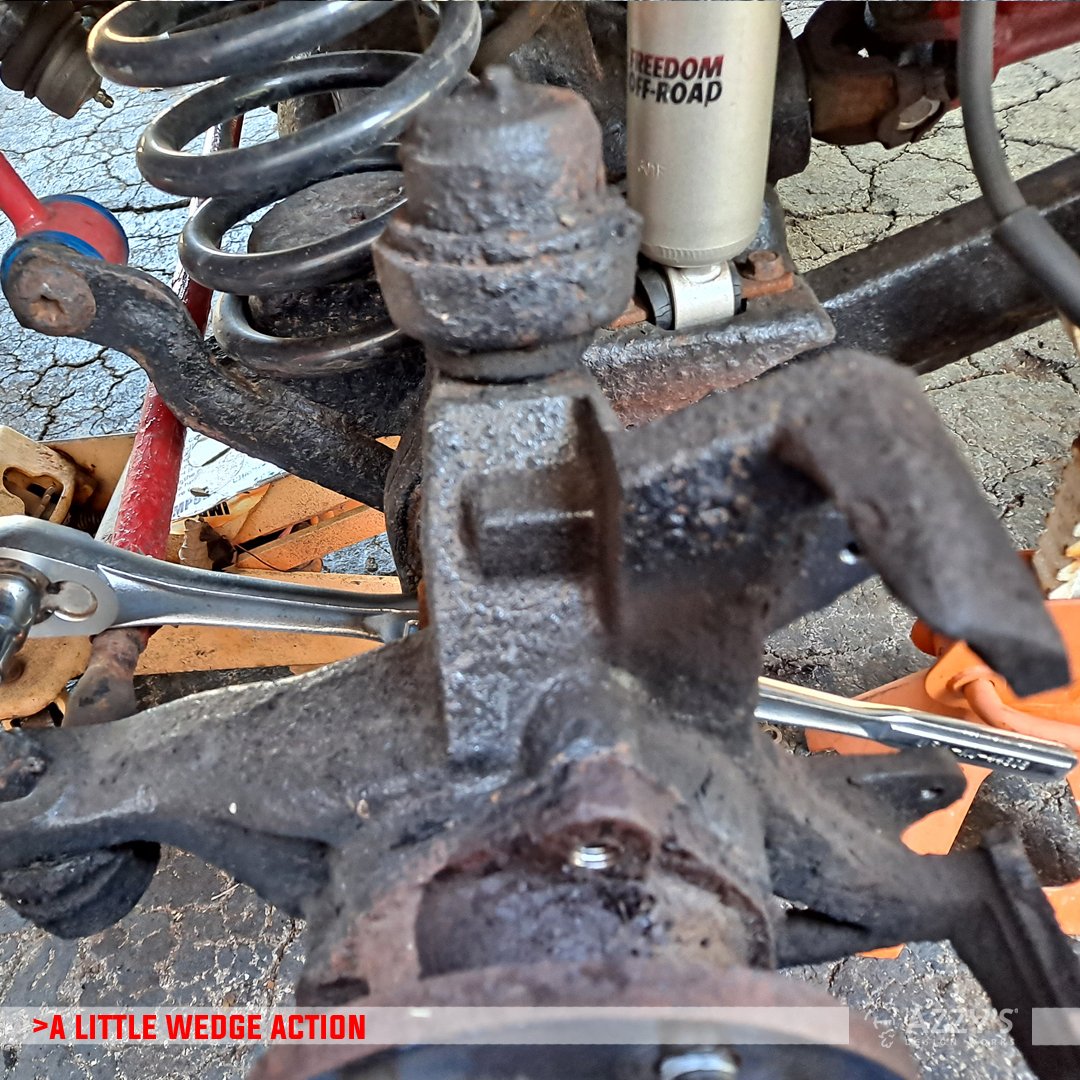
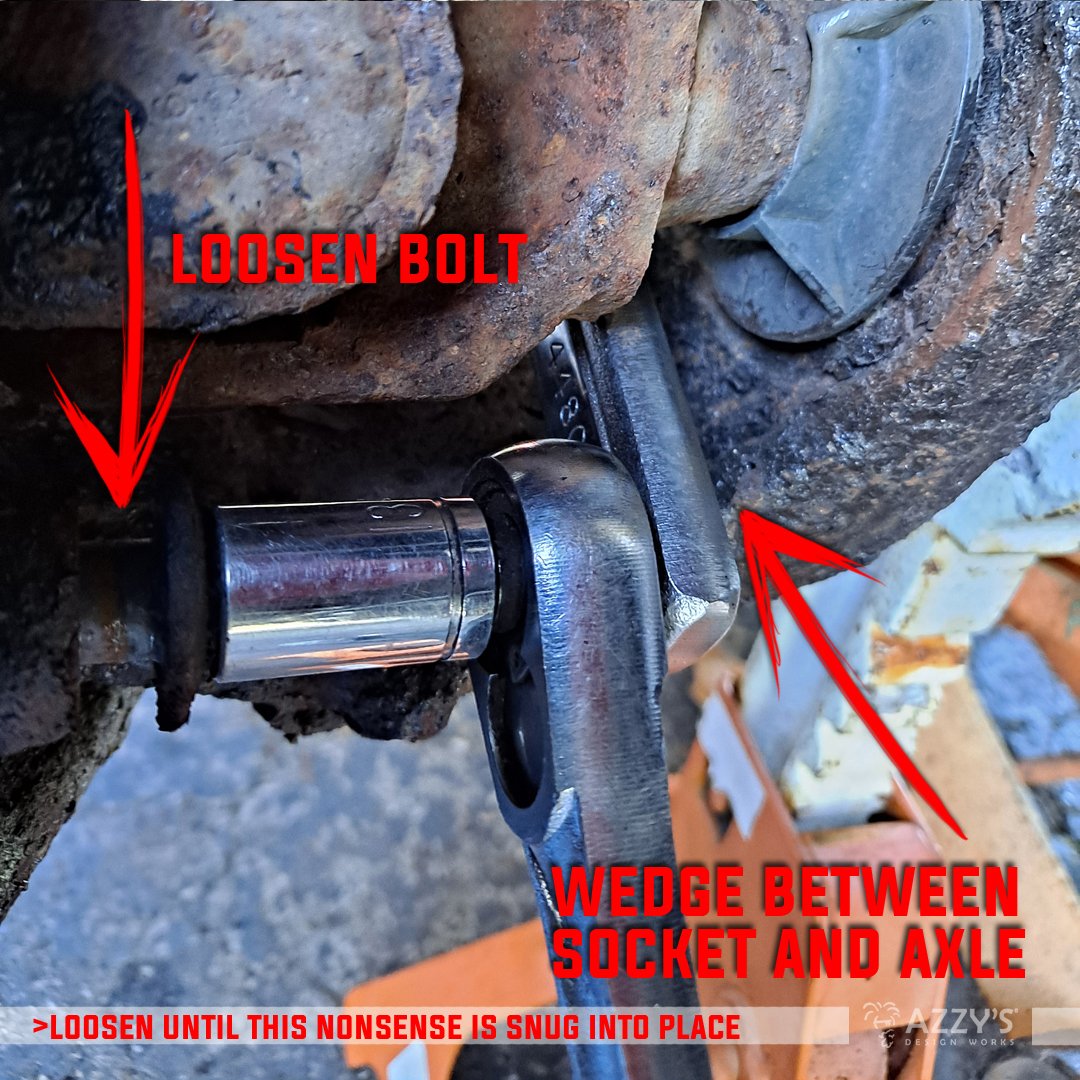
If you don’t have a deep-enough socket, you can use another ratchet (like I did in the picture) to wedge behind the existing ratchet on the bolt and the spindle housing.
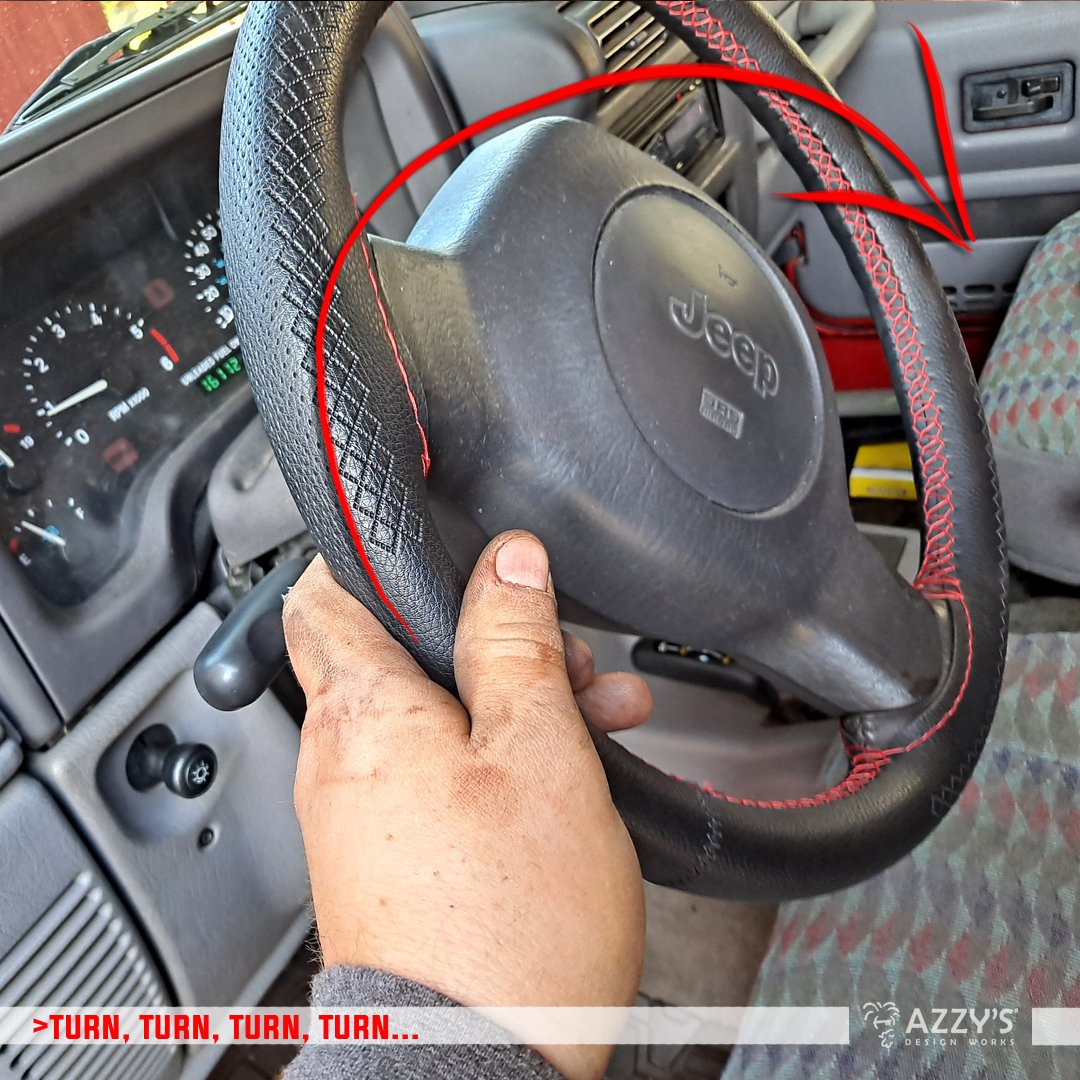
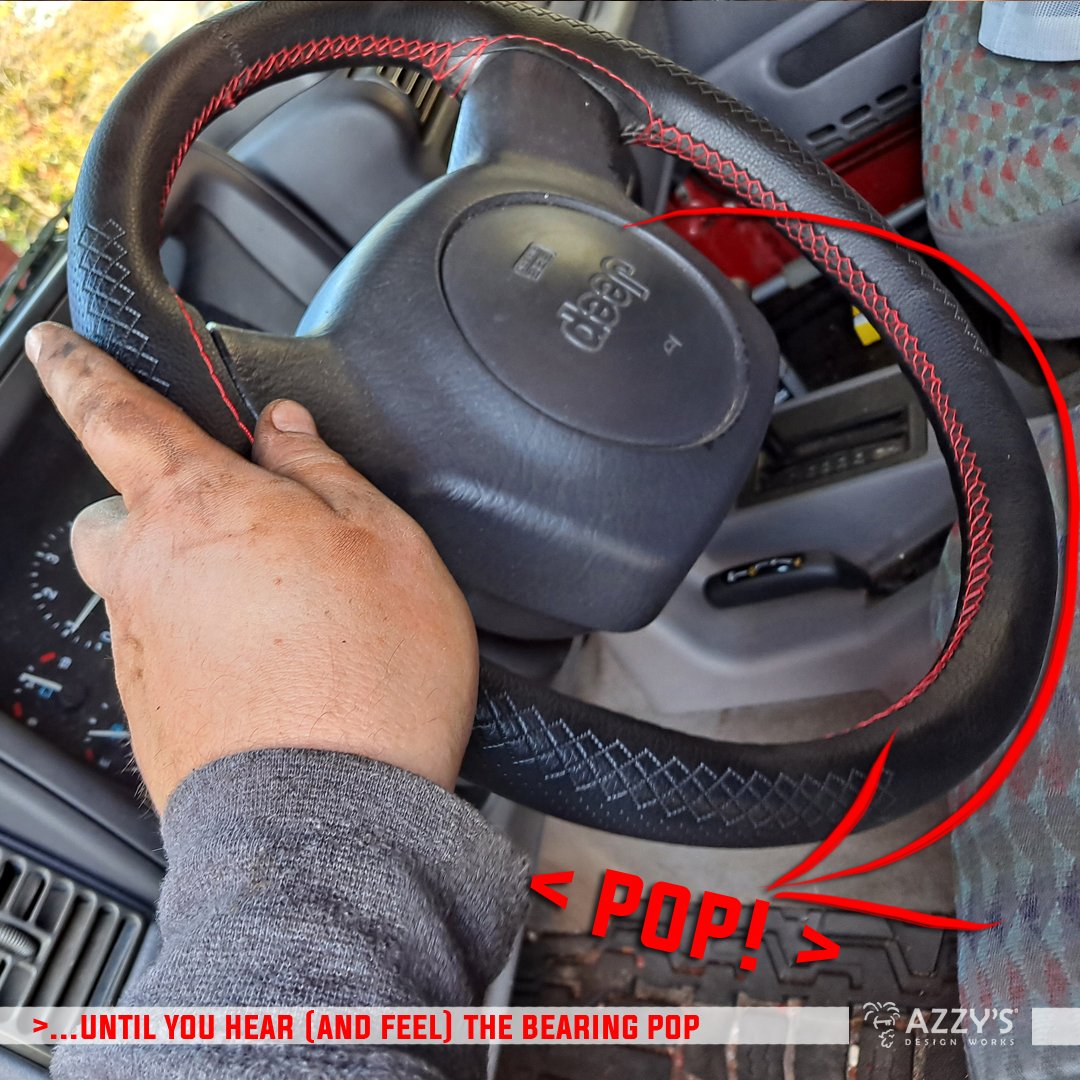
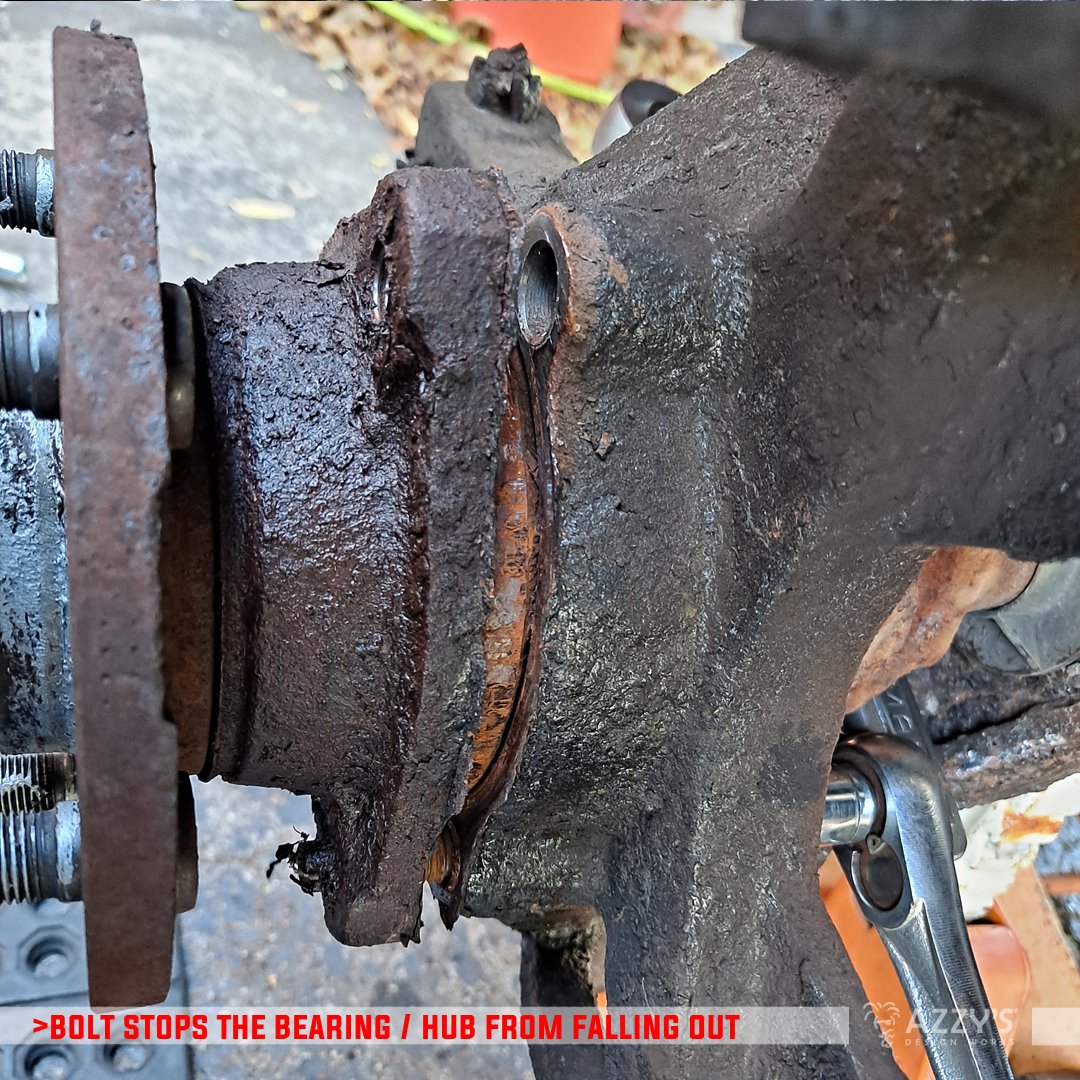
Fire up your buggy and let the power steering hydraulics to the work of popping off the wheel bearing by turning the wheel in the direction of your wedged toys. You’ll hear a distinct <POP> where the bearing will push out of the spindle housing, saving you time, aggravation, and tools not being thrown by having to manually beat the crap out of this to remove it.
Shut off your rig and get ready to pull the axle.

Pull the final bolt all the way out, sit down, and get comfortable next to the spindle.
Put one hand on the wheel hub and keep your other hand on the axle closest to the axle tube. Slowly pull the axle and bearing / hub assembly out, while trying to keep the axle shaft centered in the tube—there is a seal in there toward the pumpkin that you don’t want to tear, so try to keep the weight of the axle shaft in your hand.

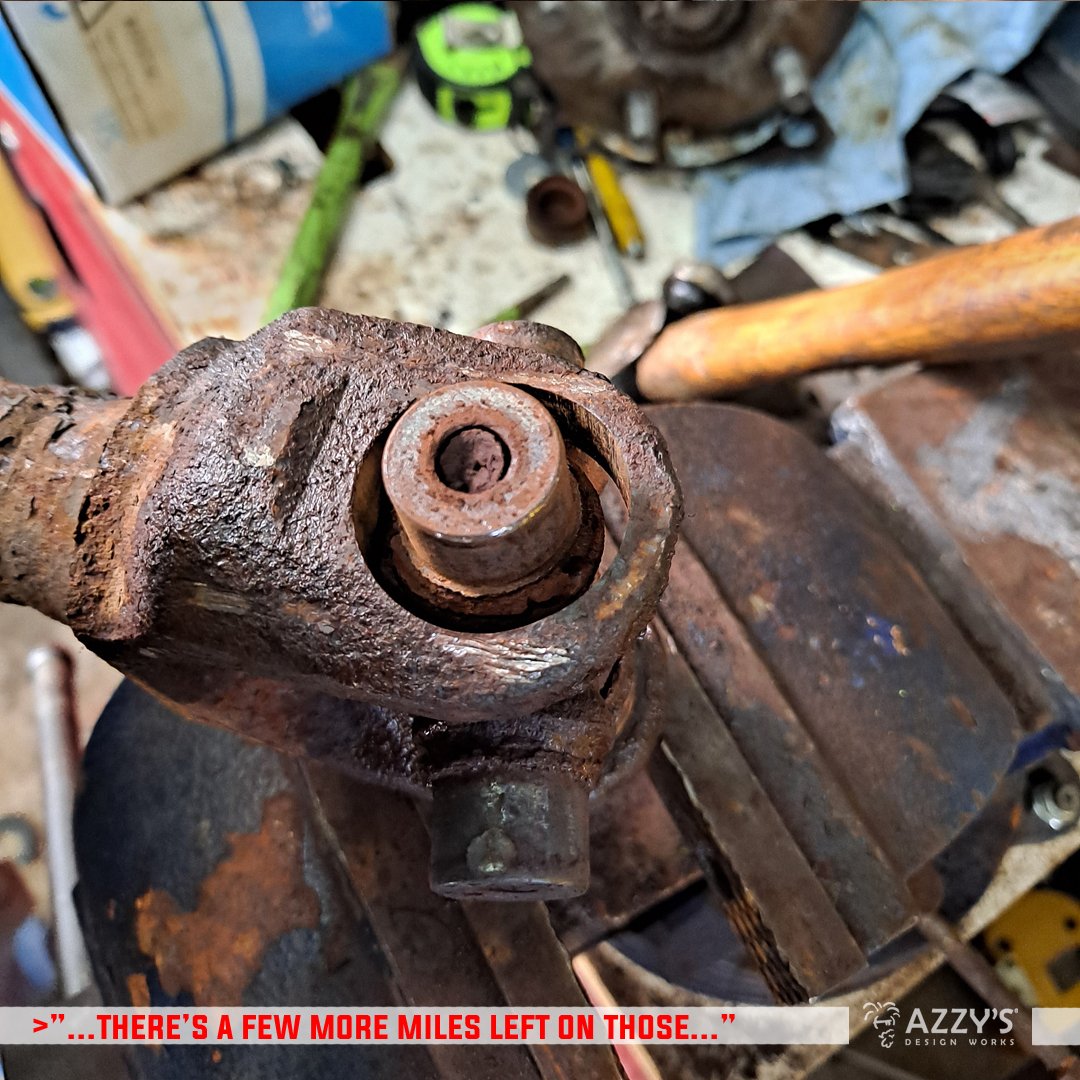
Once out, you can see the horrible state that your current universal is in, and if like mine, the need to clean up the axle shaft and spindle housing with some sandpaper and black paint.
UNIVERSAL REMOVAL PROCEDURE
If you have a larger press, this process may be easier, but I wanted to do the version that most in-the-driveway-repairers do and that’s by using a bench vise.
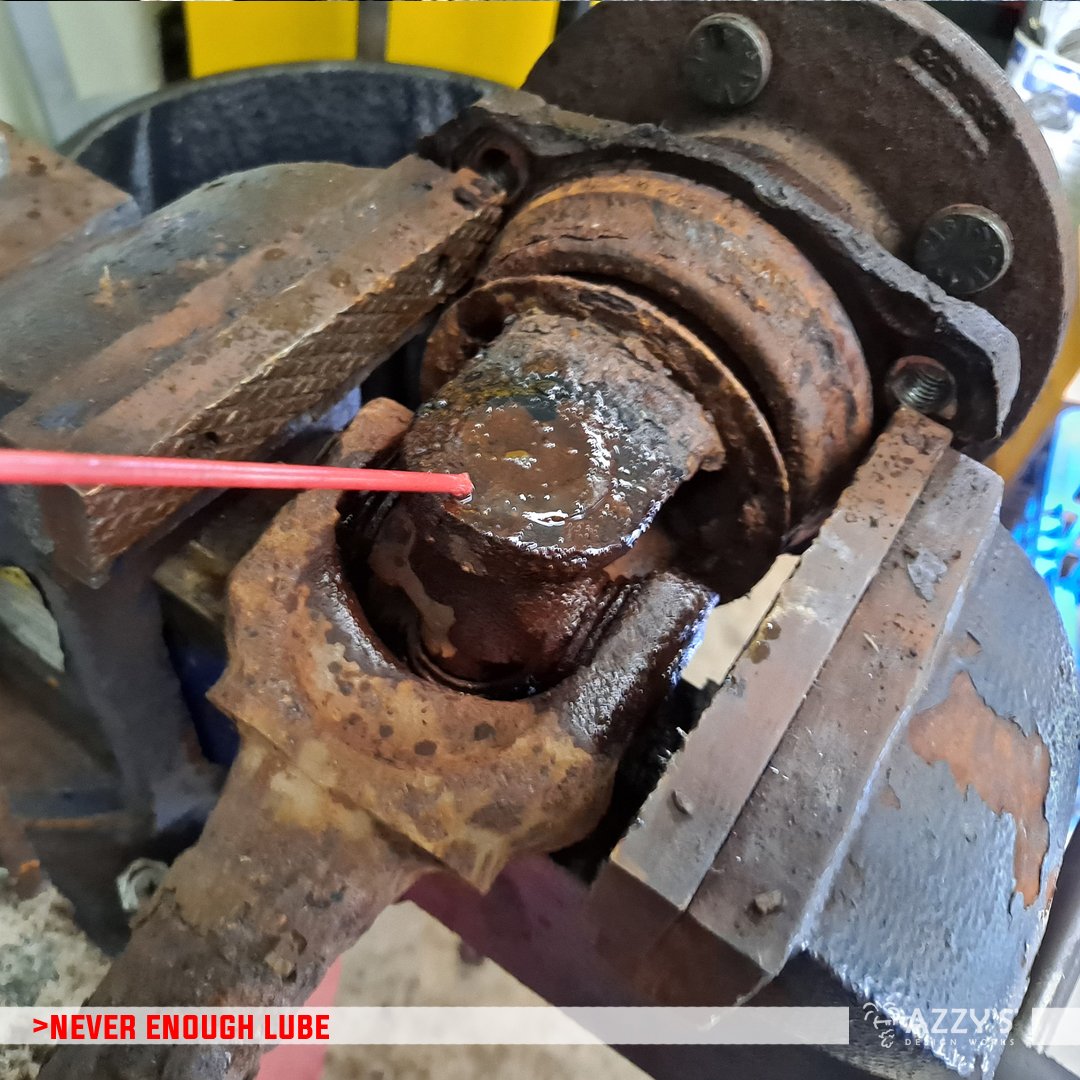
I plopped the assembly in the vise, putting a larger socket under the ear that I am working on; this will allow for play of the universal joint cap to come out as well as support the ear and not allow for bending.
Like before, I lubed the hell out of the top cap a few times, and then introduced it to my friend, Mr. Oversized Ballpeen Hammer.
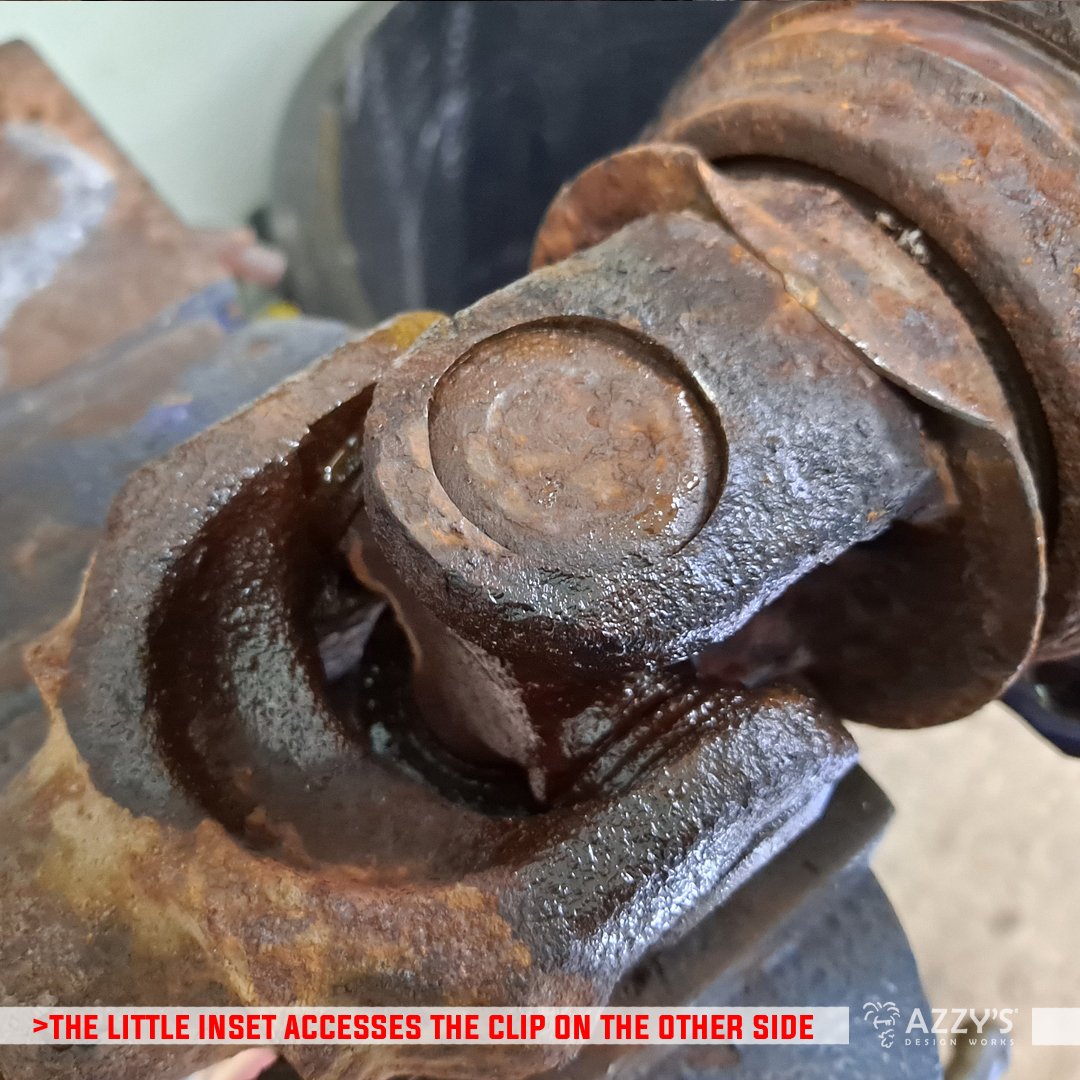
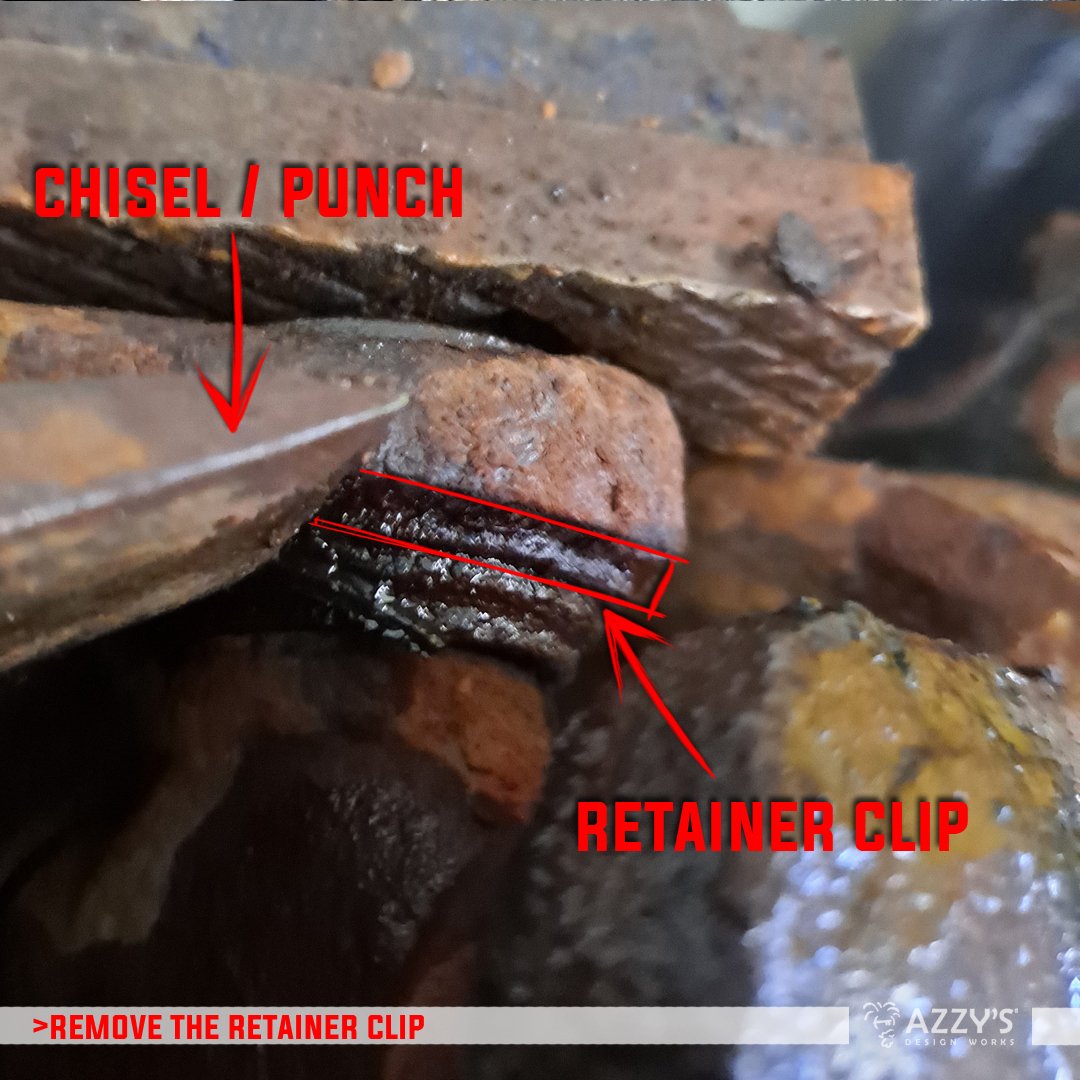

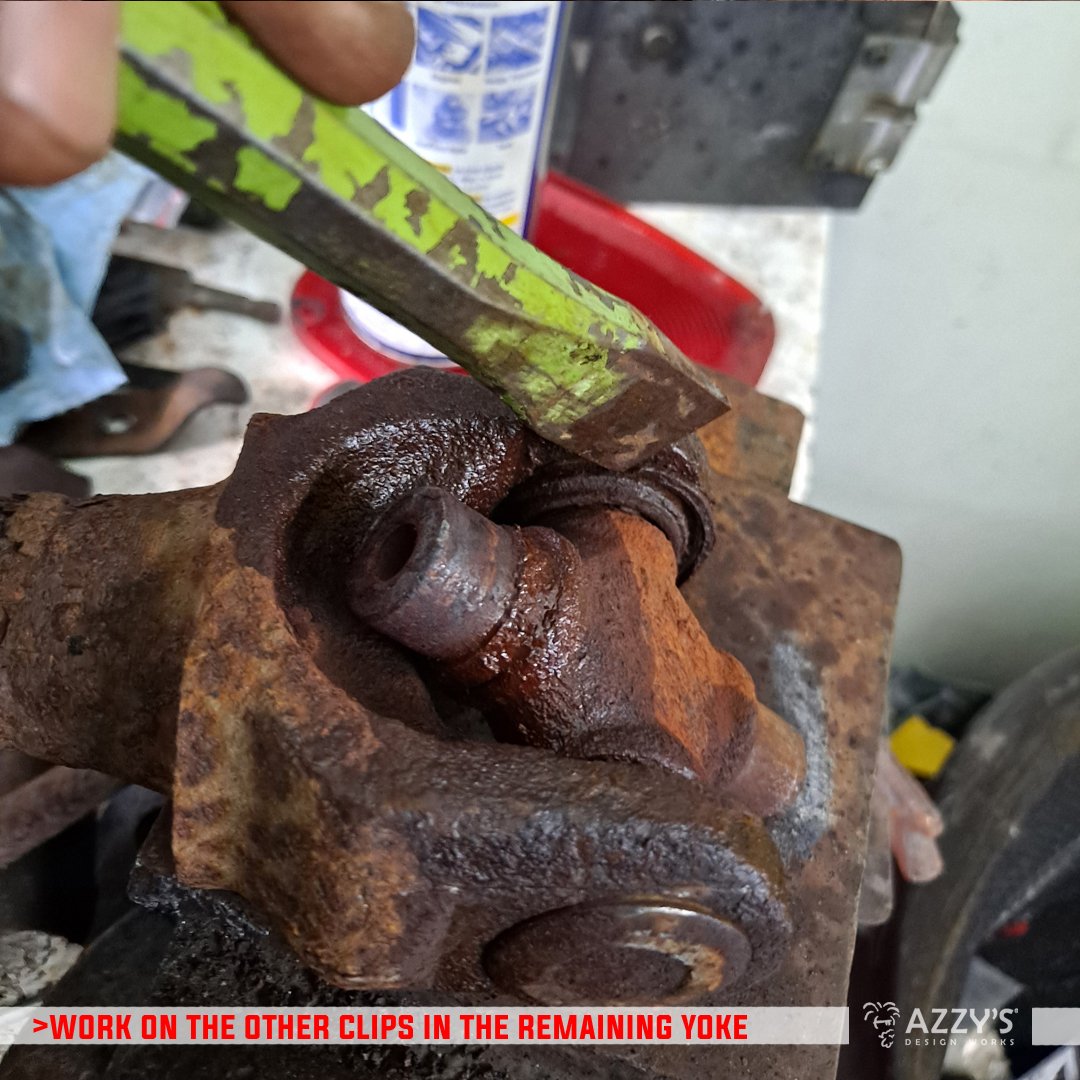
After a few aggressive wallops and some choice words about the universal joint’s mother, the cap moved in a slight amount. From here, I turned the assembly in the vise to access the retainer clip on the inside of the joint. Using a cold chisel (or punch), tippy-tap the retainer out of the space on the joint. Don’t worry if you break this—your new universal will come with a new set of them. Just make sure you get it all out, or else you’ll be smacking the hell out of the joint and it won’t move causing a bit of frustrating damage.
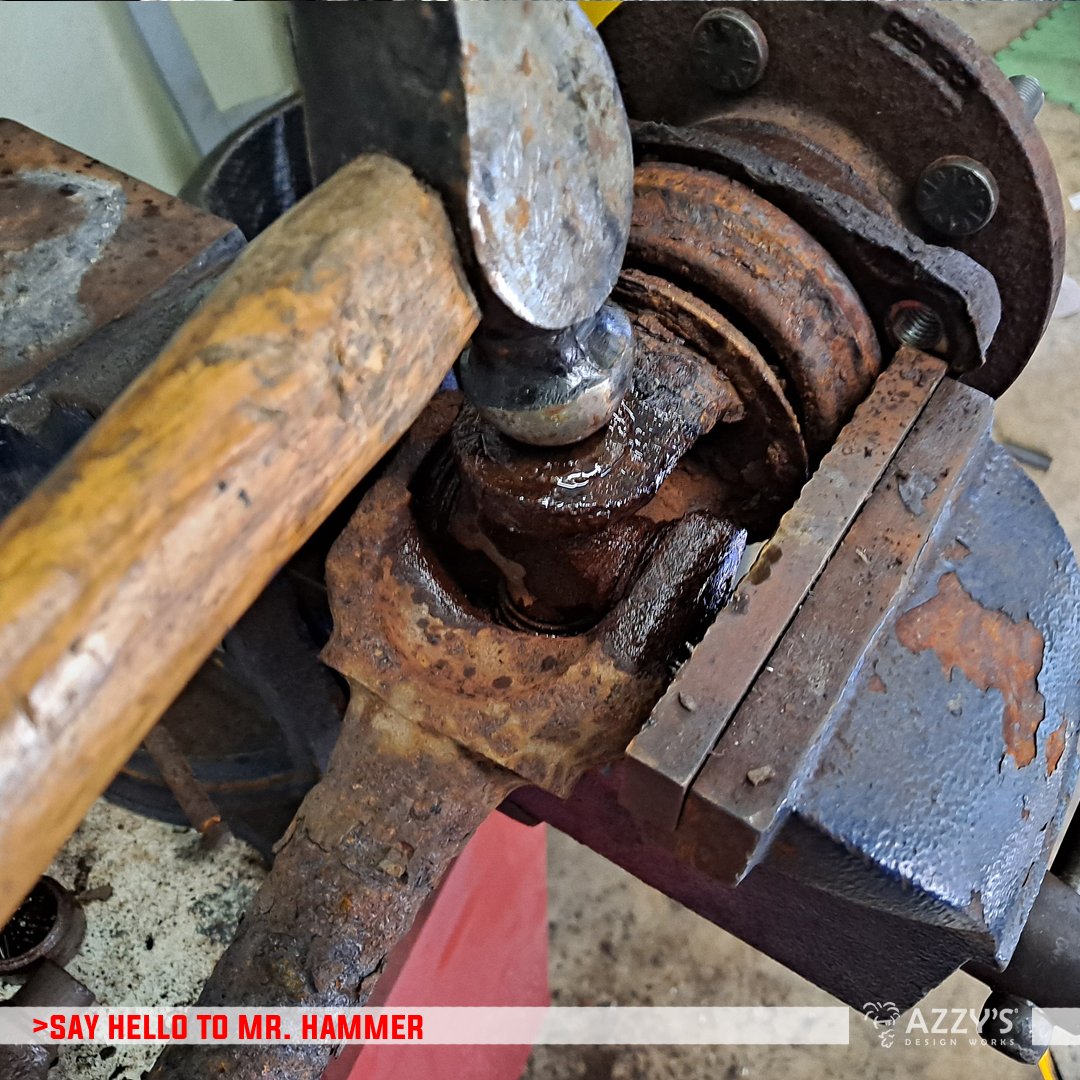
Once that is out, flip the assembly with the side you smacked-in now facing down in the vise, and support the bottom ear again. Lube the cap on this upper-facing end now, and repeat the process with Mr. I’ll-survive-the-zombie-apocalypse Hammer, loosening the cap from the grip of rust.

Grab your favorite persuasion socket™ and have it help your Cannibal-Corpse-song-inspired hammer push the cap and joint toward the bottom.
Flip the assembly in the vise to access the retainer clip for this side, and tap that bad boy out. I make it a habit to do this as to not forget to remove things and hurry the process. Take your time—it results in less bullshit you’ll have to deal with later.

Get back to the upper cap and smack the jerk through. If your vise is large enough, you can attempt to press the cap out into the same socket-on-the-other-ear method. Once the joint pushes through, the end result is a sad remnant of stability.
Laugh at it, flip the assembly around, and smack the joint to push the cap out of the opposite end.
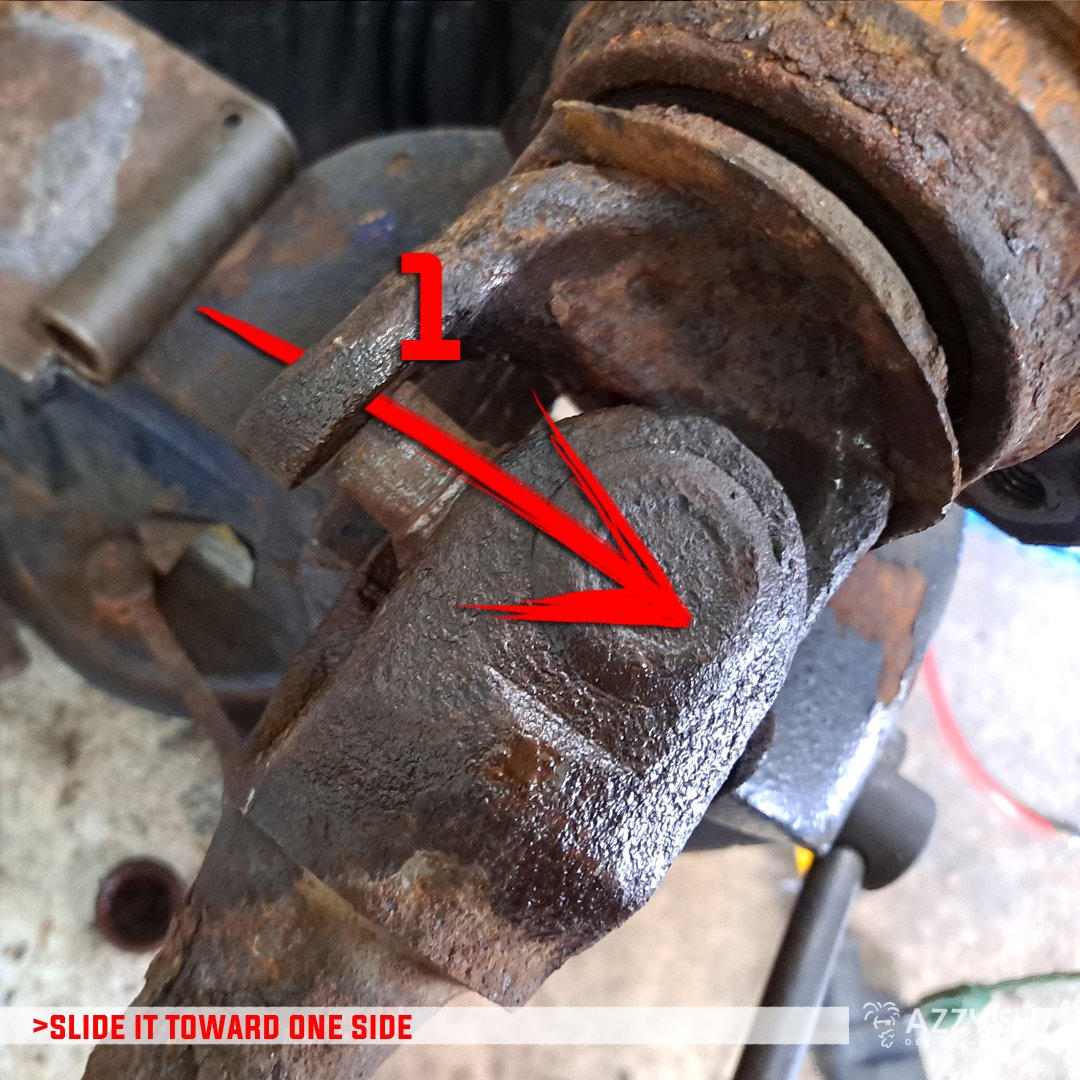
When both caps are off one plane, pull the shaft toward one of the ears. Pull the shaft toward you, and the joint should rotate a little to where you can pull out the shaft completely. Time to secure the other part of the assembly and get that joint loosed, too.
Lube, beat, and repeat on the other cap, making sure to take the time to get into the joint side and remove the retainers from the joint.
Marvel at the horrible remnants of grease, dirt, rust, and whatever other fluids you drive through (I don’t judge). Hit that with your hammer and get the other cap to pop. Don’t forget that retainer, too!

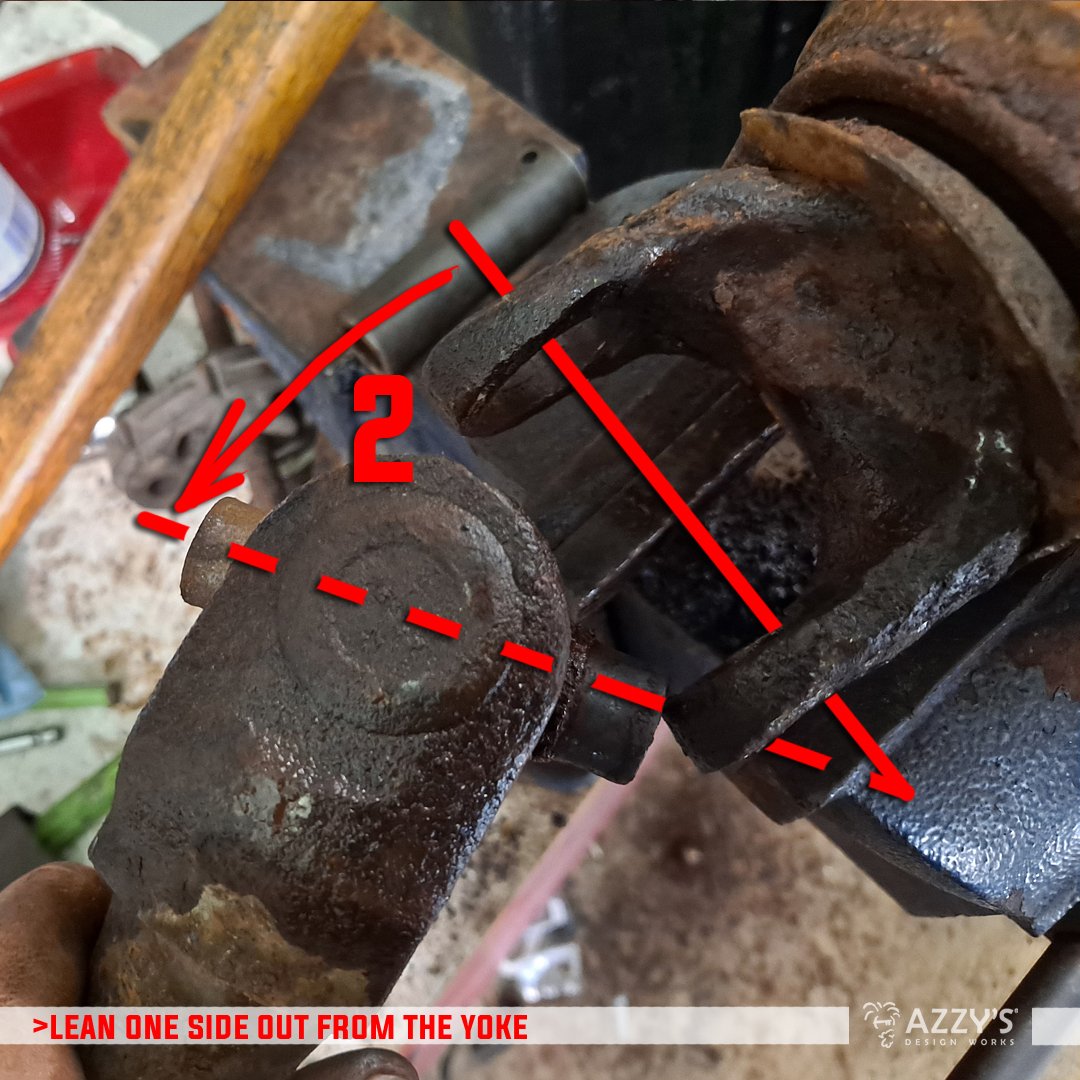
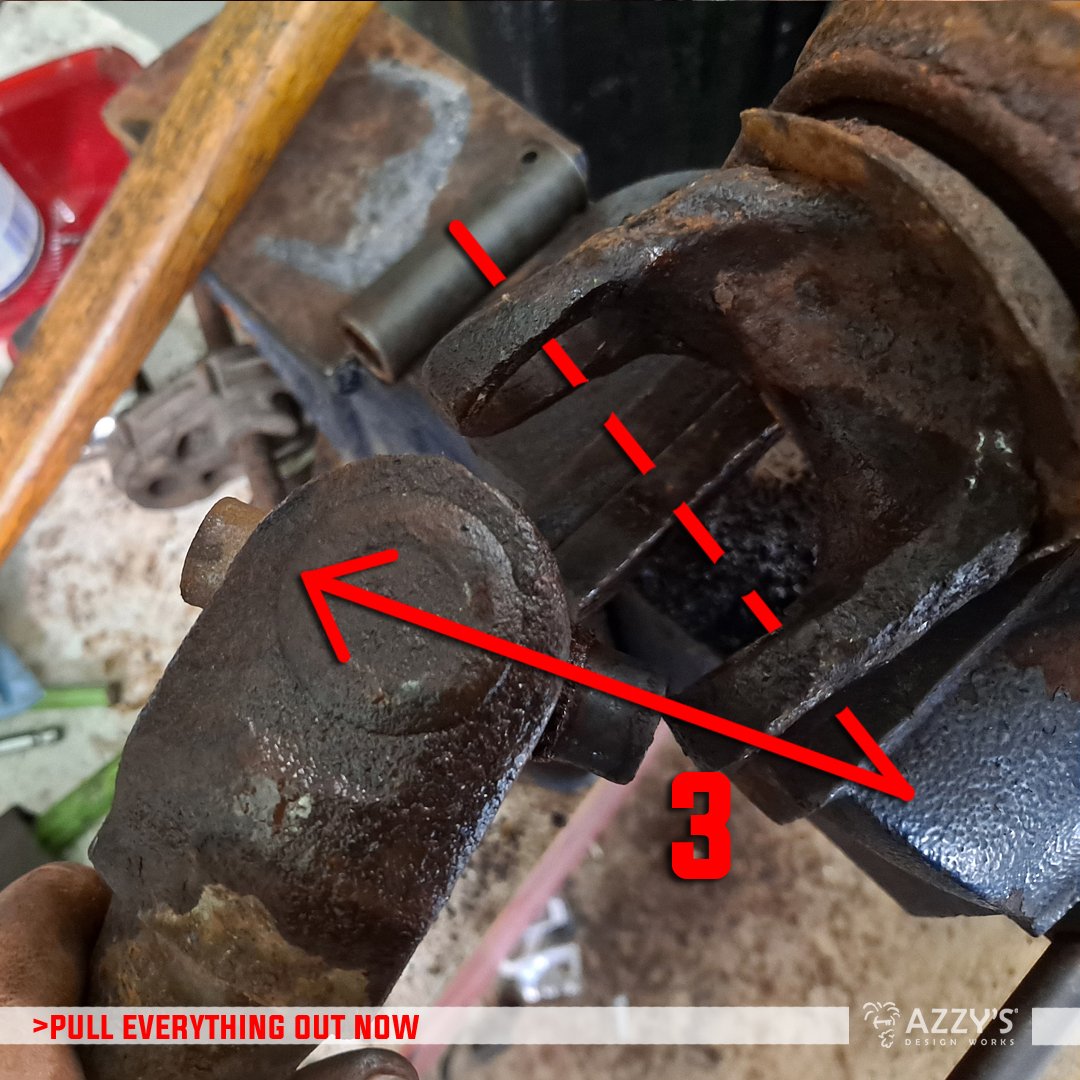
With a little twist-and-pull, you can get the joint out of the remaining part.
CLEAN UP

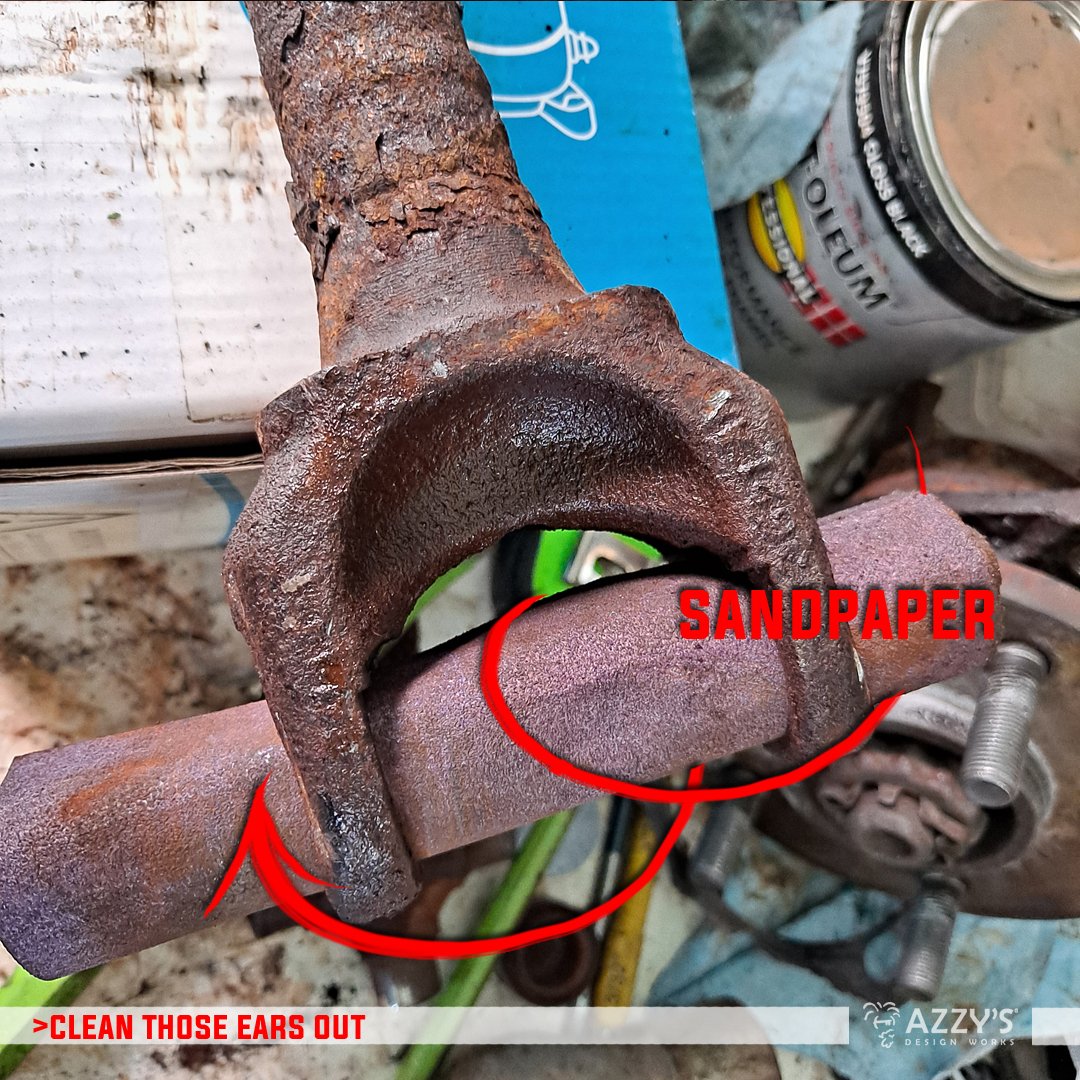
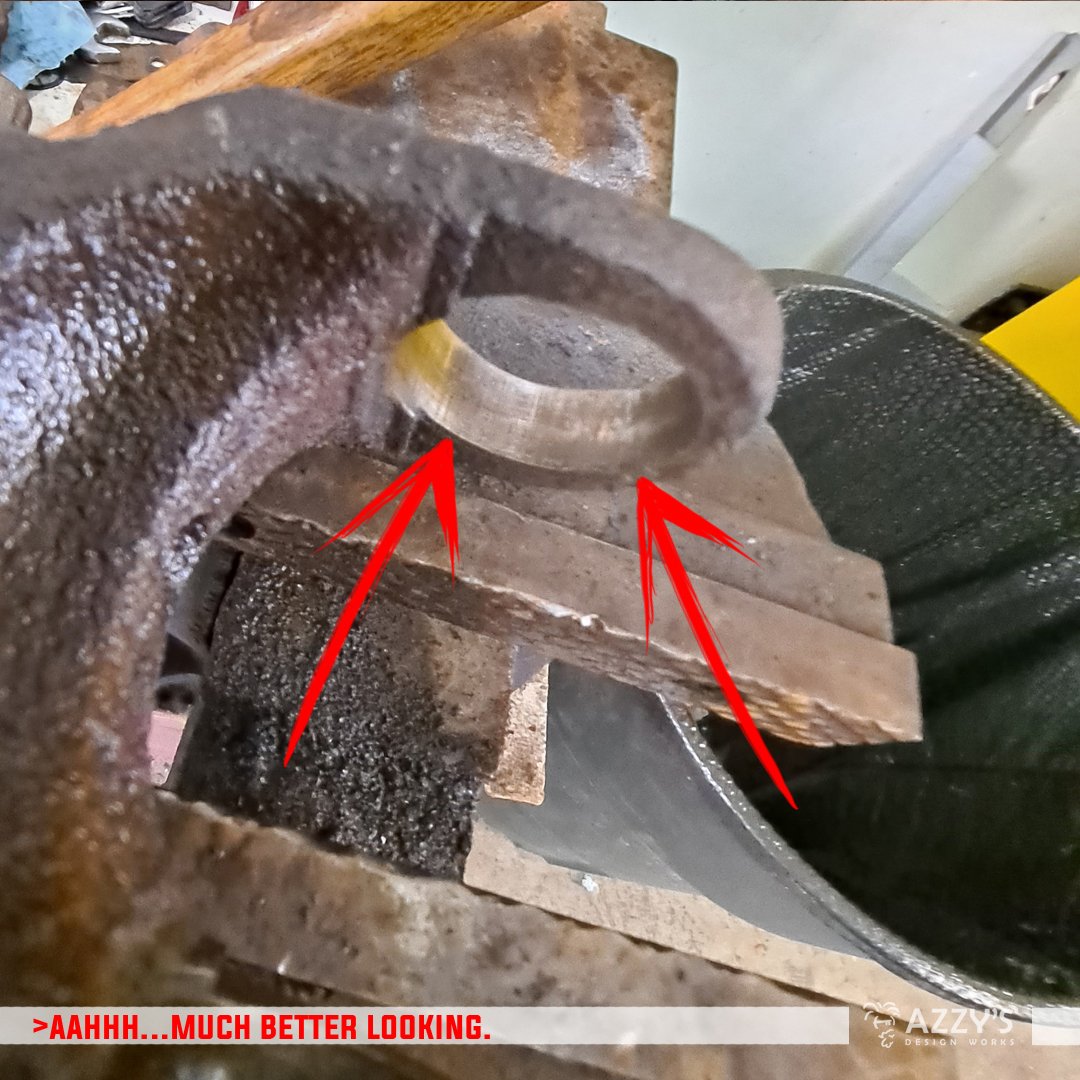
Before you go shoving things into open orifices, make sure you clean things up—be considerate of your receptive partner; use some brake clean and a little sandpaper to have the race clean of debris and make reassembly require less force. While you are here, clean up the rest of the shaft, too, and touch up with paint where necessary.
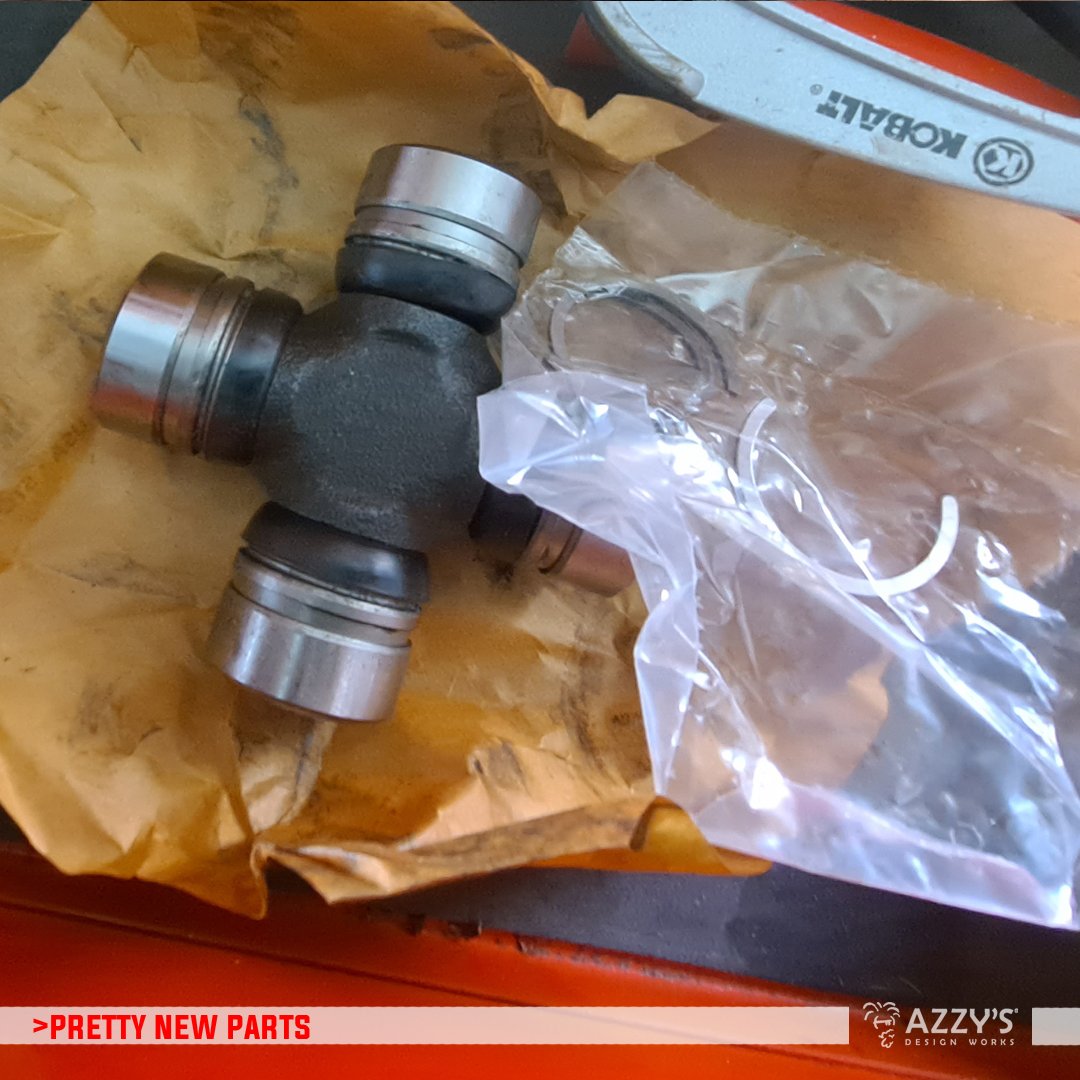
NEW UNIVERSAL JOINT
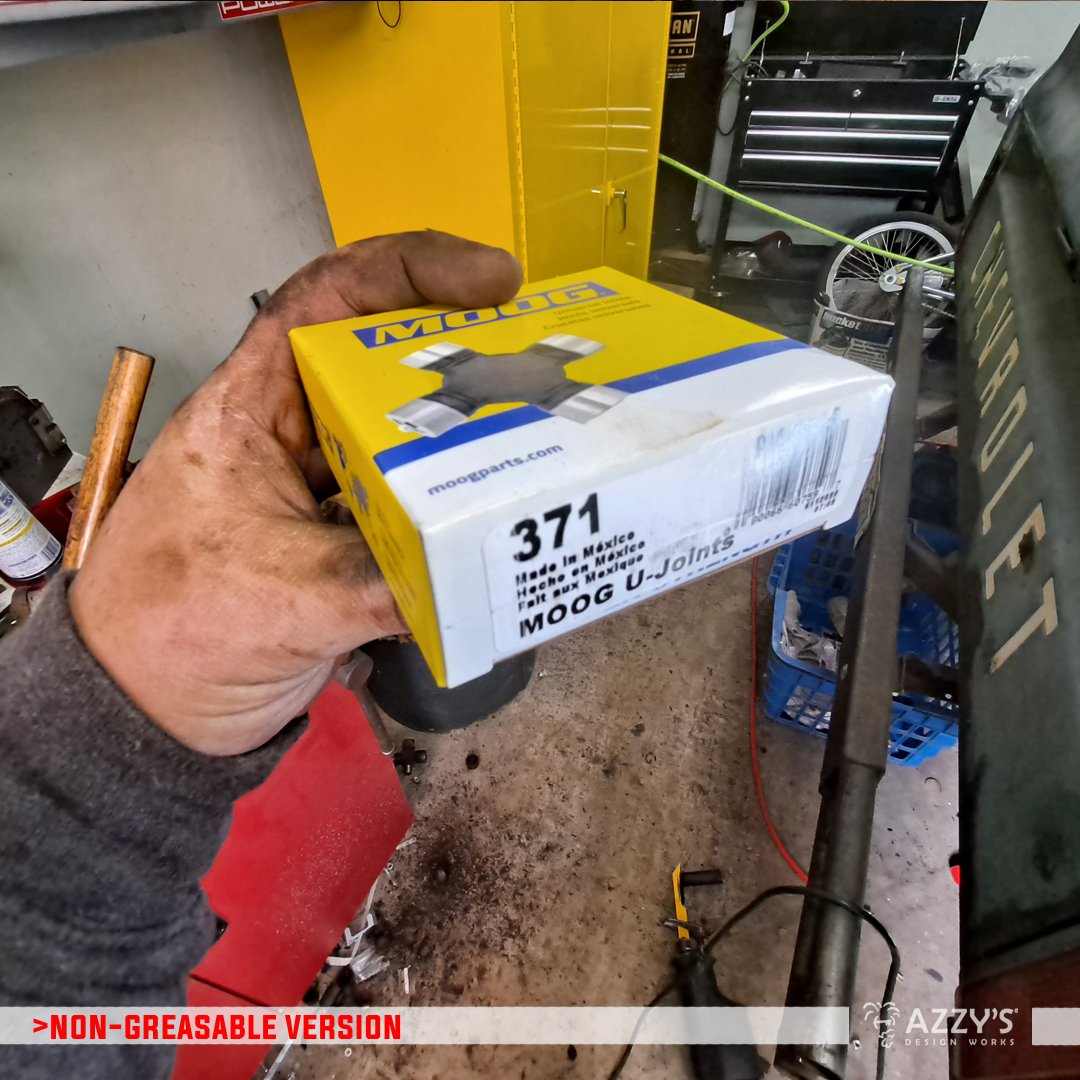
For my TJ, it was spec’d out to use MOOG’s 371 u-joint; I wanted something made in the US and wasn’t going to be a pain in the ass down the road. I chose the non-greaseable versions simply because of my bad luck shearing the greaseable ones with my truck.
Again, save your shrieking comments about part choice via social media—I really don’t care.
When opening your new joint, make sure you mind that there are the retainer clips; if these aren’t in the package, go back to the store. You could reuse the old ones you pulled off the removed universal joints, but I would only do that if it is last-case-scenario.

Pull the caps off of the new u-joint, and put them aside—far from where you are banging on things as to not disturb the needle bearings in the cap. Since these are pre-greased, they pretty stable and don’t dance around too much when the cap is off. Keep the black rubber dust boots on the joint while installing—if you try to install these after putting on the joint to the shaft, you risk tearing the boot or introducing other contaminants.
Take the time to press down the needle bearing that are sticking up a little; I’ve found that keeping things all the same by pressing the bearings flush makes for less of a chance in folding one of them over inside the cap and landing you in a world of hurt.
THE INSTALL
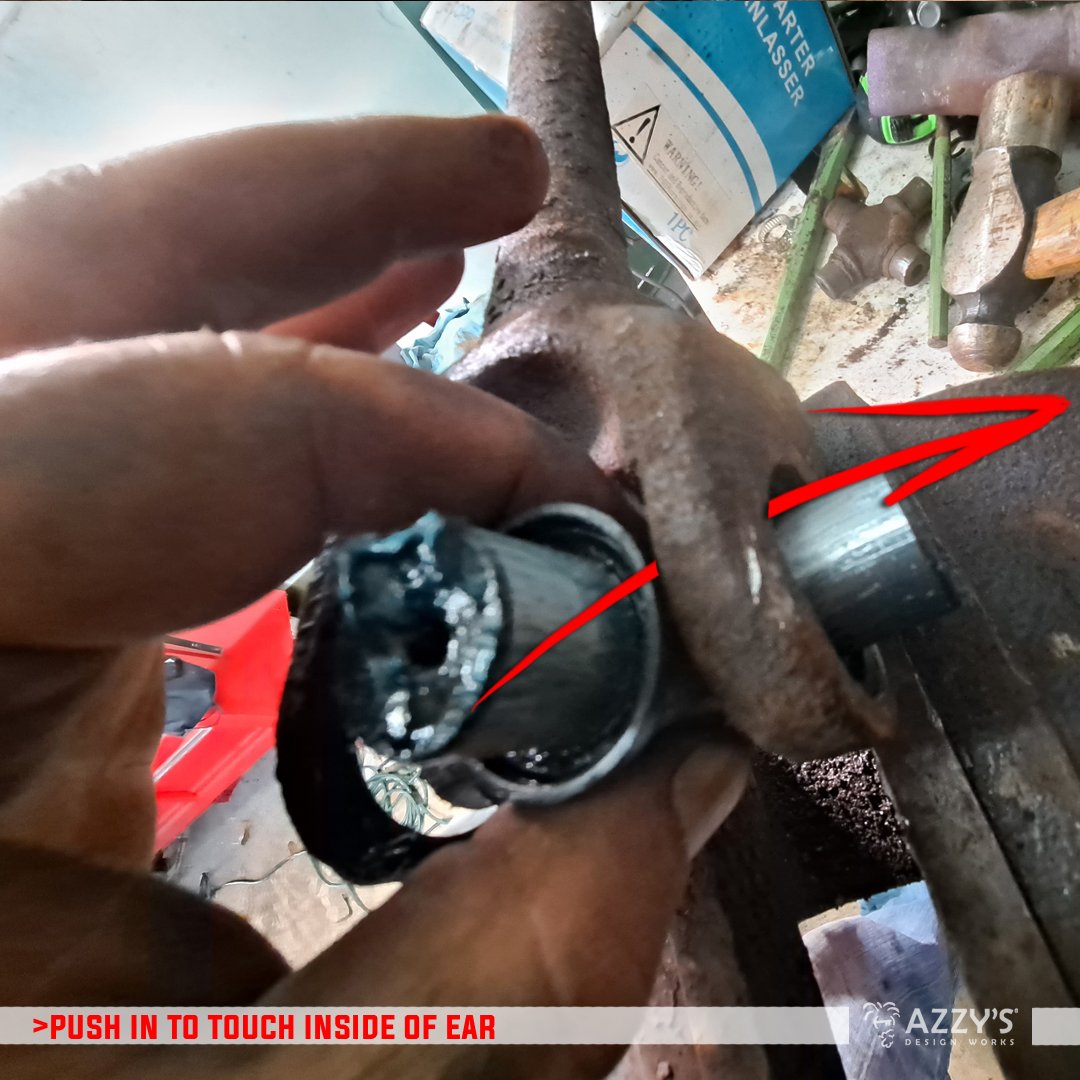
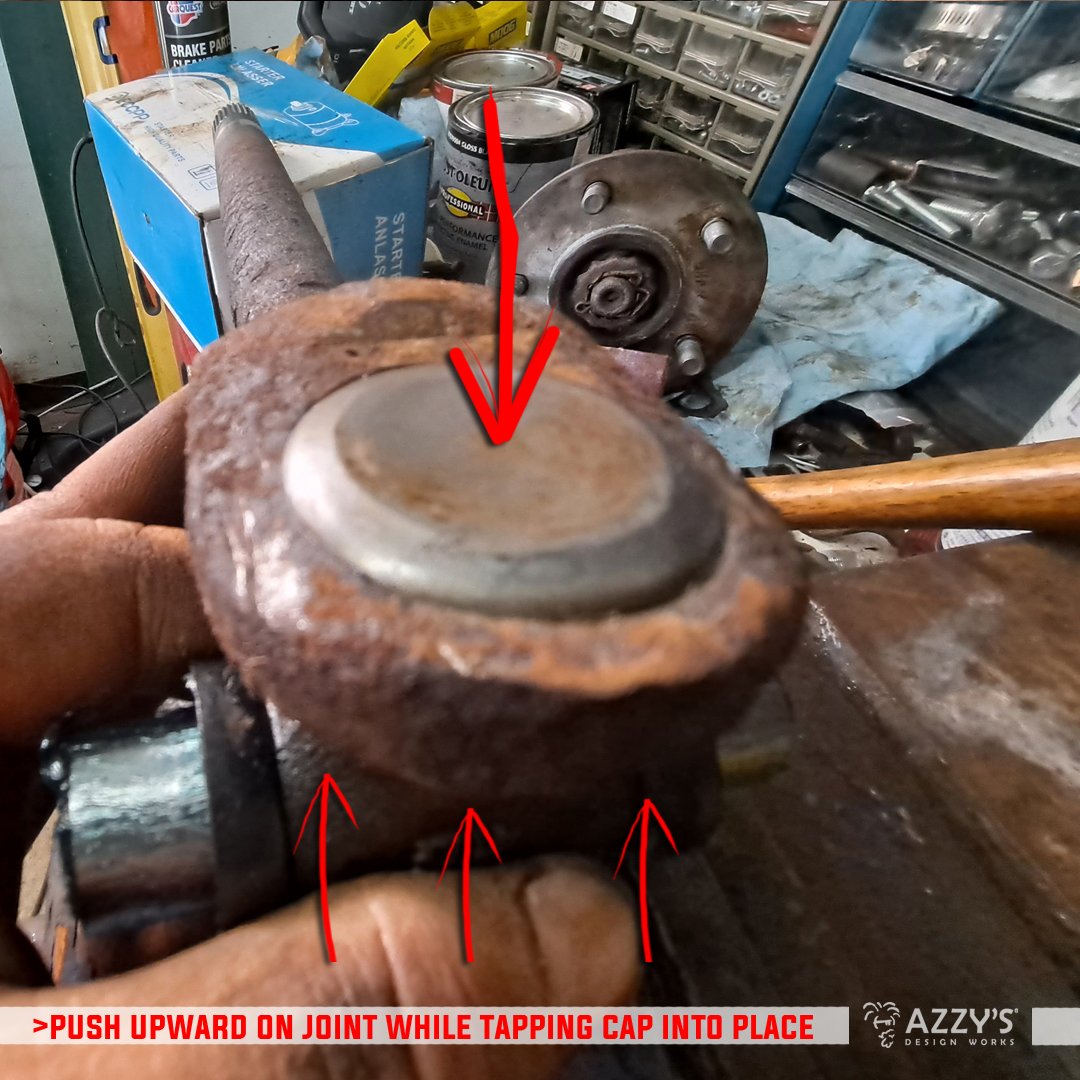
Back over at the vise, poke one of the sides of the new u-joint through one of the ears of the shaft. Grab one of the caps and push it onto the protrusion. If you feel resistance, pop off the cap and check the needle bearing alignment inside of the cap, otherwise, push the cap into the ear. If you need to, turn the shaft on its side, and while putting upward pressure on the u-joint, tap with the cap with a hammer (or use the vise to gently push it in).

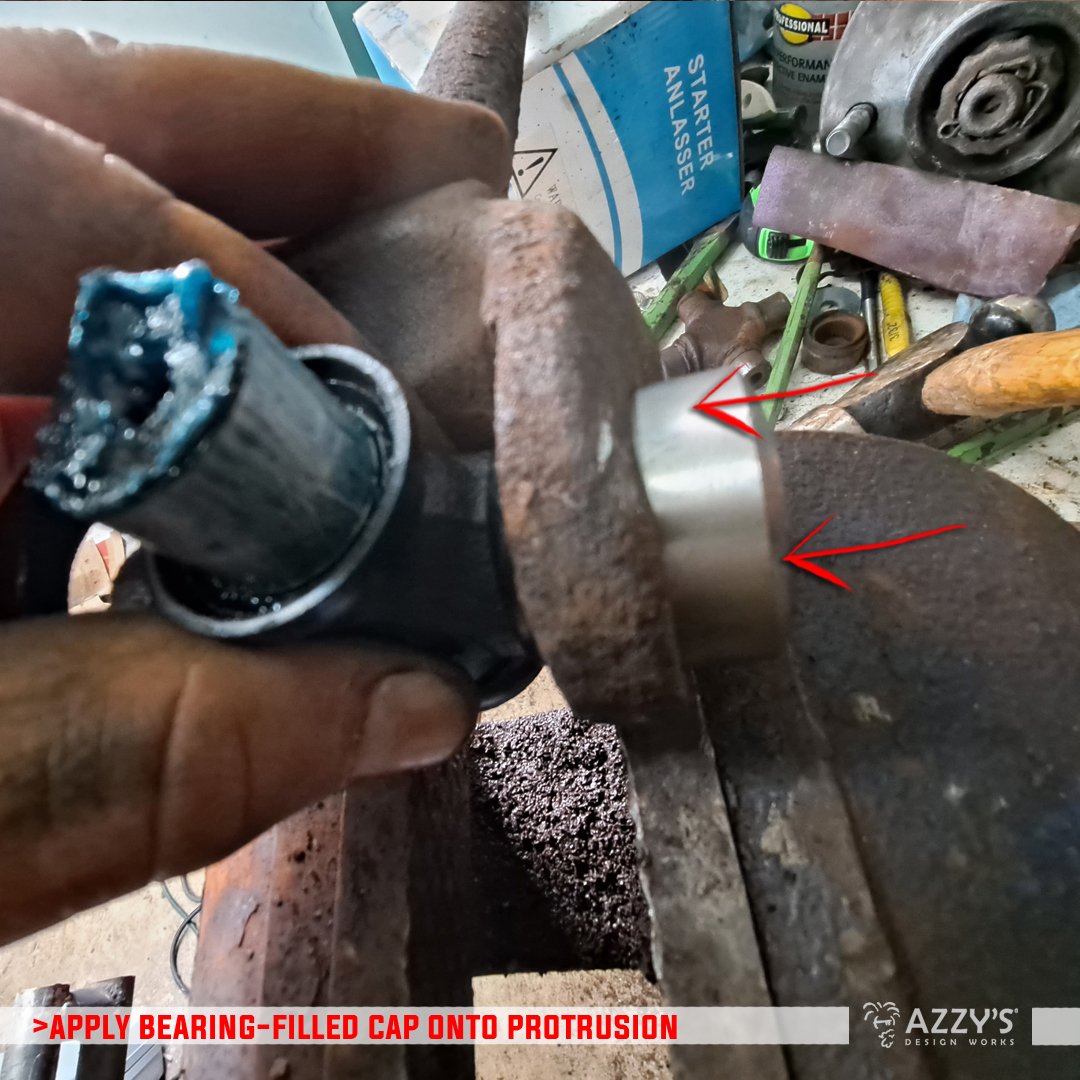
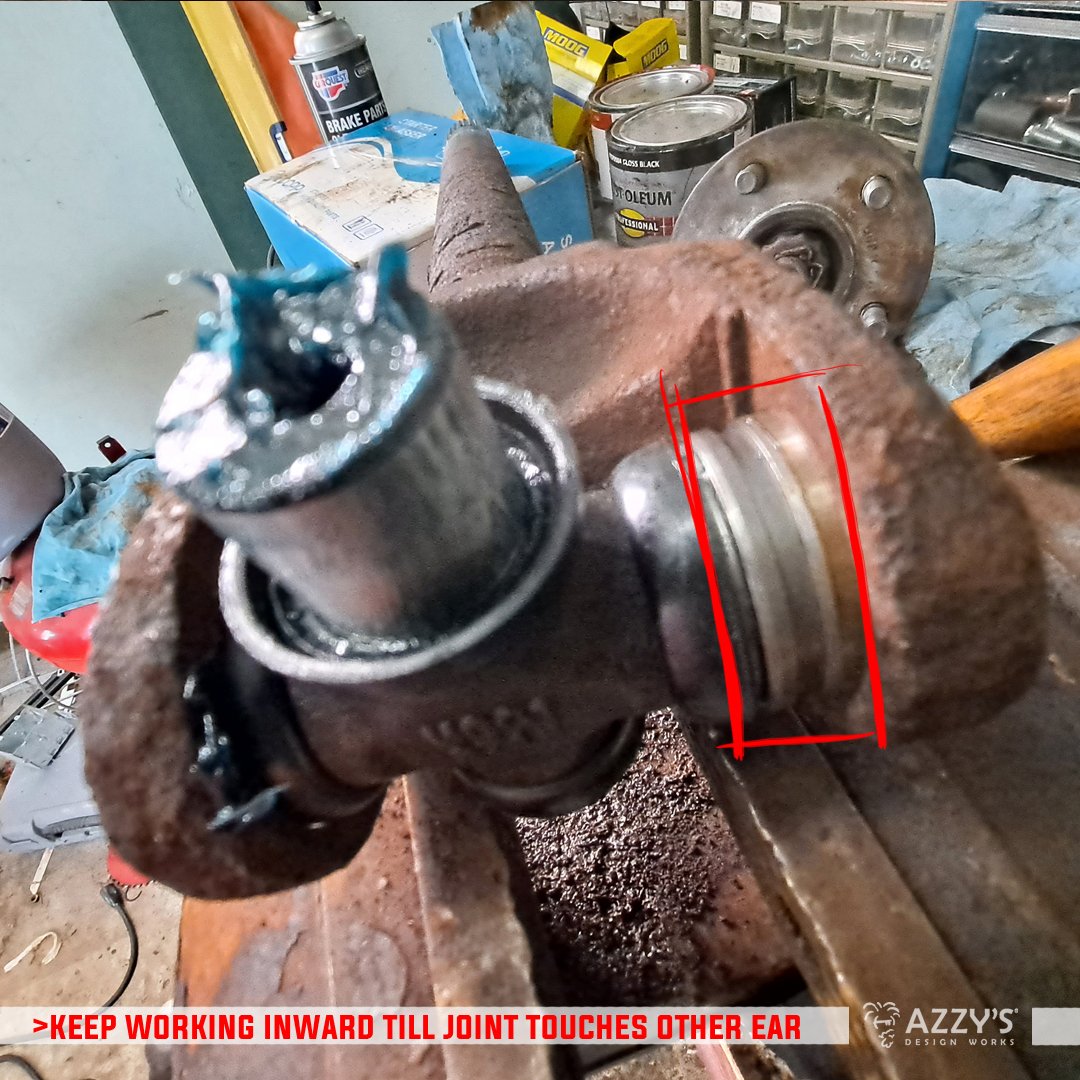
If you tap yours in as far as I did in the picture, you’ll have plenty of room to apply the other cap securely without the fear of it coming apart from the existing needle-bearing-filled cap and making a mess.
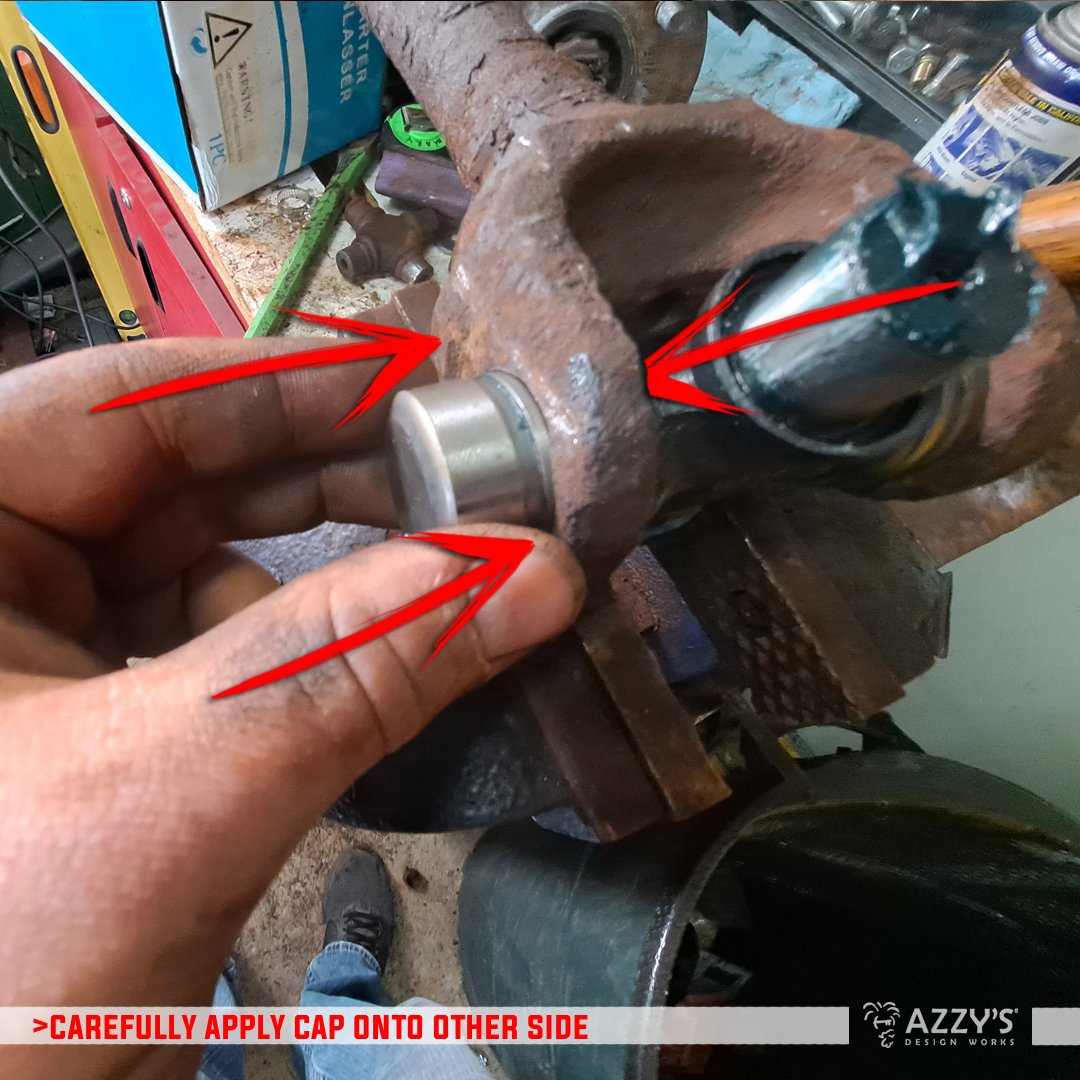
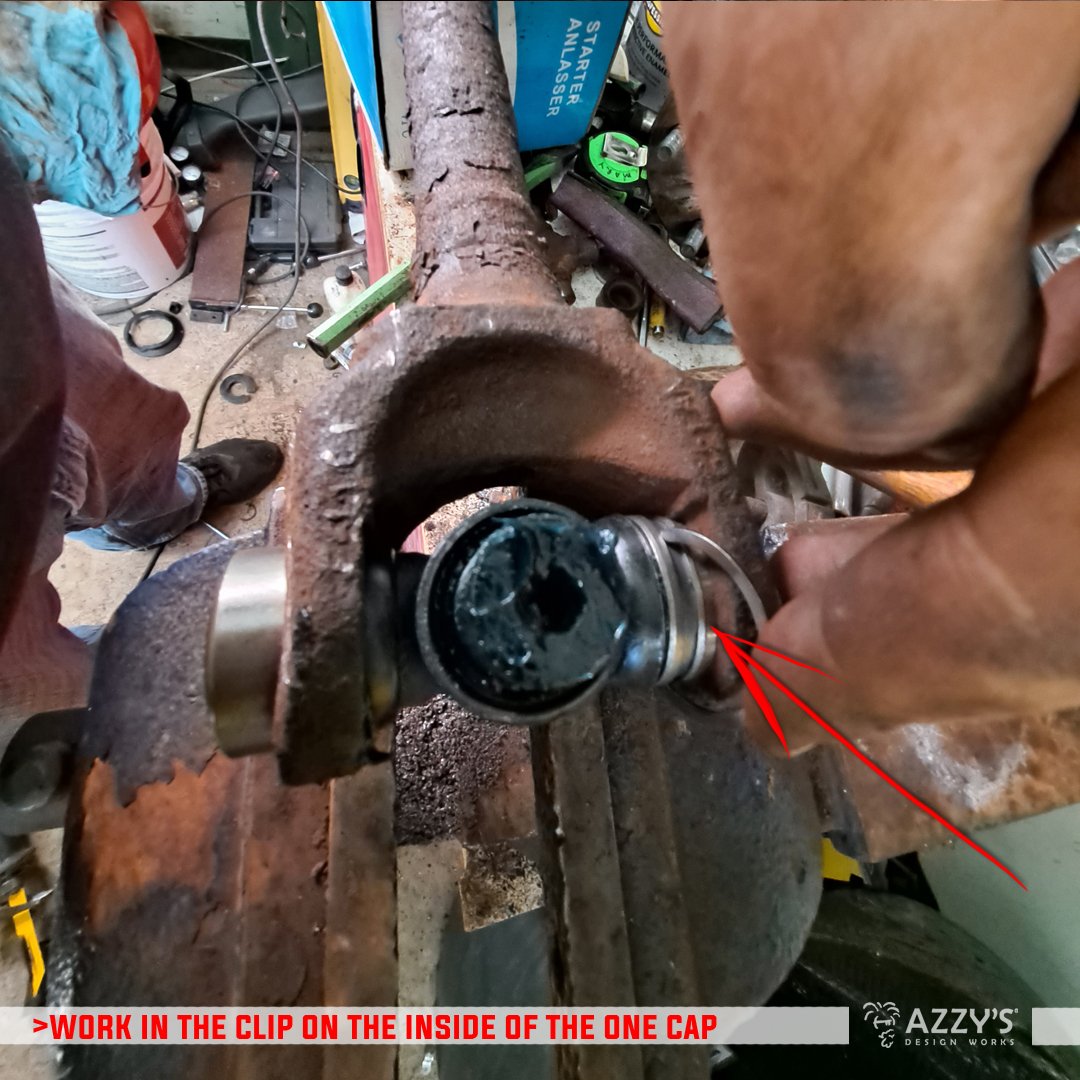
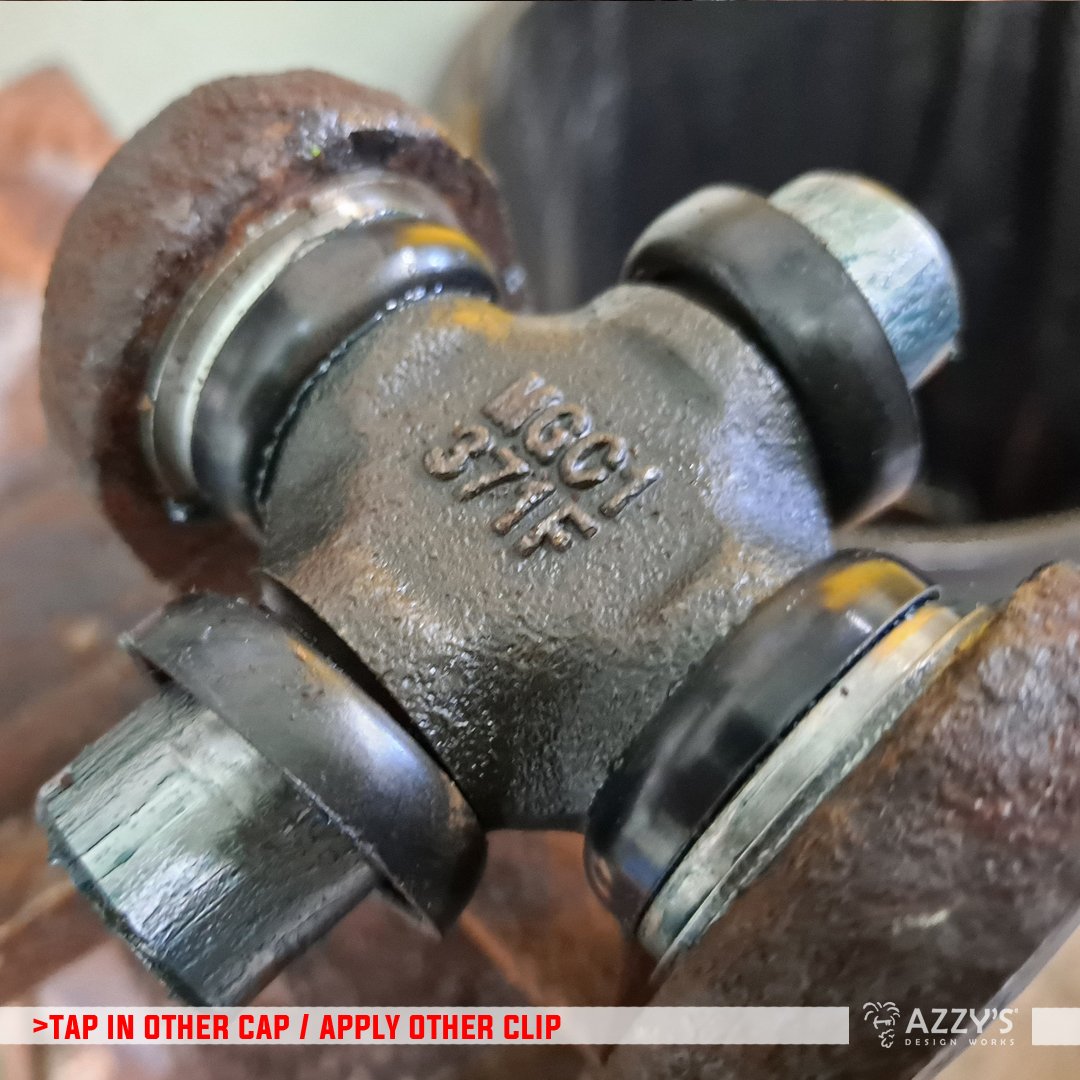
Now slide the joint over to the open ear, and then slide the cap onto the joint. Because of the other cap being pressed in further, it should keep things aligned and you won’t have to worry too much about bearings falling out. Like you did before, hold the joint and give the new cap a couple taps (or press with a vise). Don’t go too far—you need to get those retainers in, so plop the one on the side that was pressed in further, and then proceed with the pressing process again.
Once you have both sides in and the retainers wedged, you can move on to getting the other half of the assembly onto the joint. This is one of those gigs where the more you do the process, the faster it goes.
DOUBLE CHECK
Once you have both sides of the assembly together on the new universal joint, try moving the joint. If you feel any stuttering—like a jump—when trying to twist, you may have a needle bearing that has come loose.
If you broke a cap during reassembling, that is due to one of those needles coming up to the end of the joint and laying between the top of the joint and the cap. You’ll need to get a whole new joint in this case.
PUT IT BACK ON
Getting your rig back together is easier than taking it apart—you know where everything is going to go, and it is just the opposite of how you took it apart.
When getting things back together, replace any bolts that are totally butchered by the elements and use some brake clean on those threaded surfaces. Take your time sliding the shaft back into the axle housing as to not rip the seal in the pumpkin using the method mentioned above.